Assistive Art Palette
Through my engineering course, our class was given an opportunity to be part of a project called "Assistive Technology (AT) Makers". We were presented with students in our school district who had disabilities, along with requests they had to make certain aspects of their daily life more suitable. This is where the redesign of an art palette came into being.
Starting as a group project in January 2024 and ending as an individual project in November, I took on various roadblocks and unexpected results, but they made the final product ever more rewarding. Below, you’ll follow along with every part of the process!
How did it start?
This project was put into play during my sophomore year (2023-2024 school year). Our group, the Ridgeview Re-Inventors, started the creation of a more assistive art palette for a student at our school, Sierrah. She enjoys painting, but modern art palettes are unsuitable. Therefore, she requested for something that would allow her to paint with ease. We believe that a hobby like art should always be accessible to anyone and everyone, so we came up with a few different ideas to help with this and combined them all into one palette. We loved that we not only got to do a deep dive into different design techniques, along with machines that we hadn’t used before, but that we also got to create something that would be beneficial for someone else.
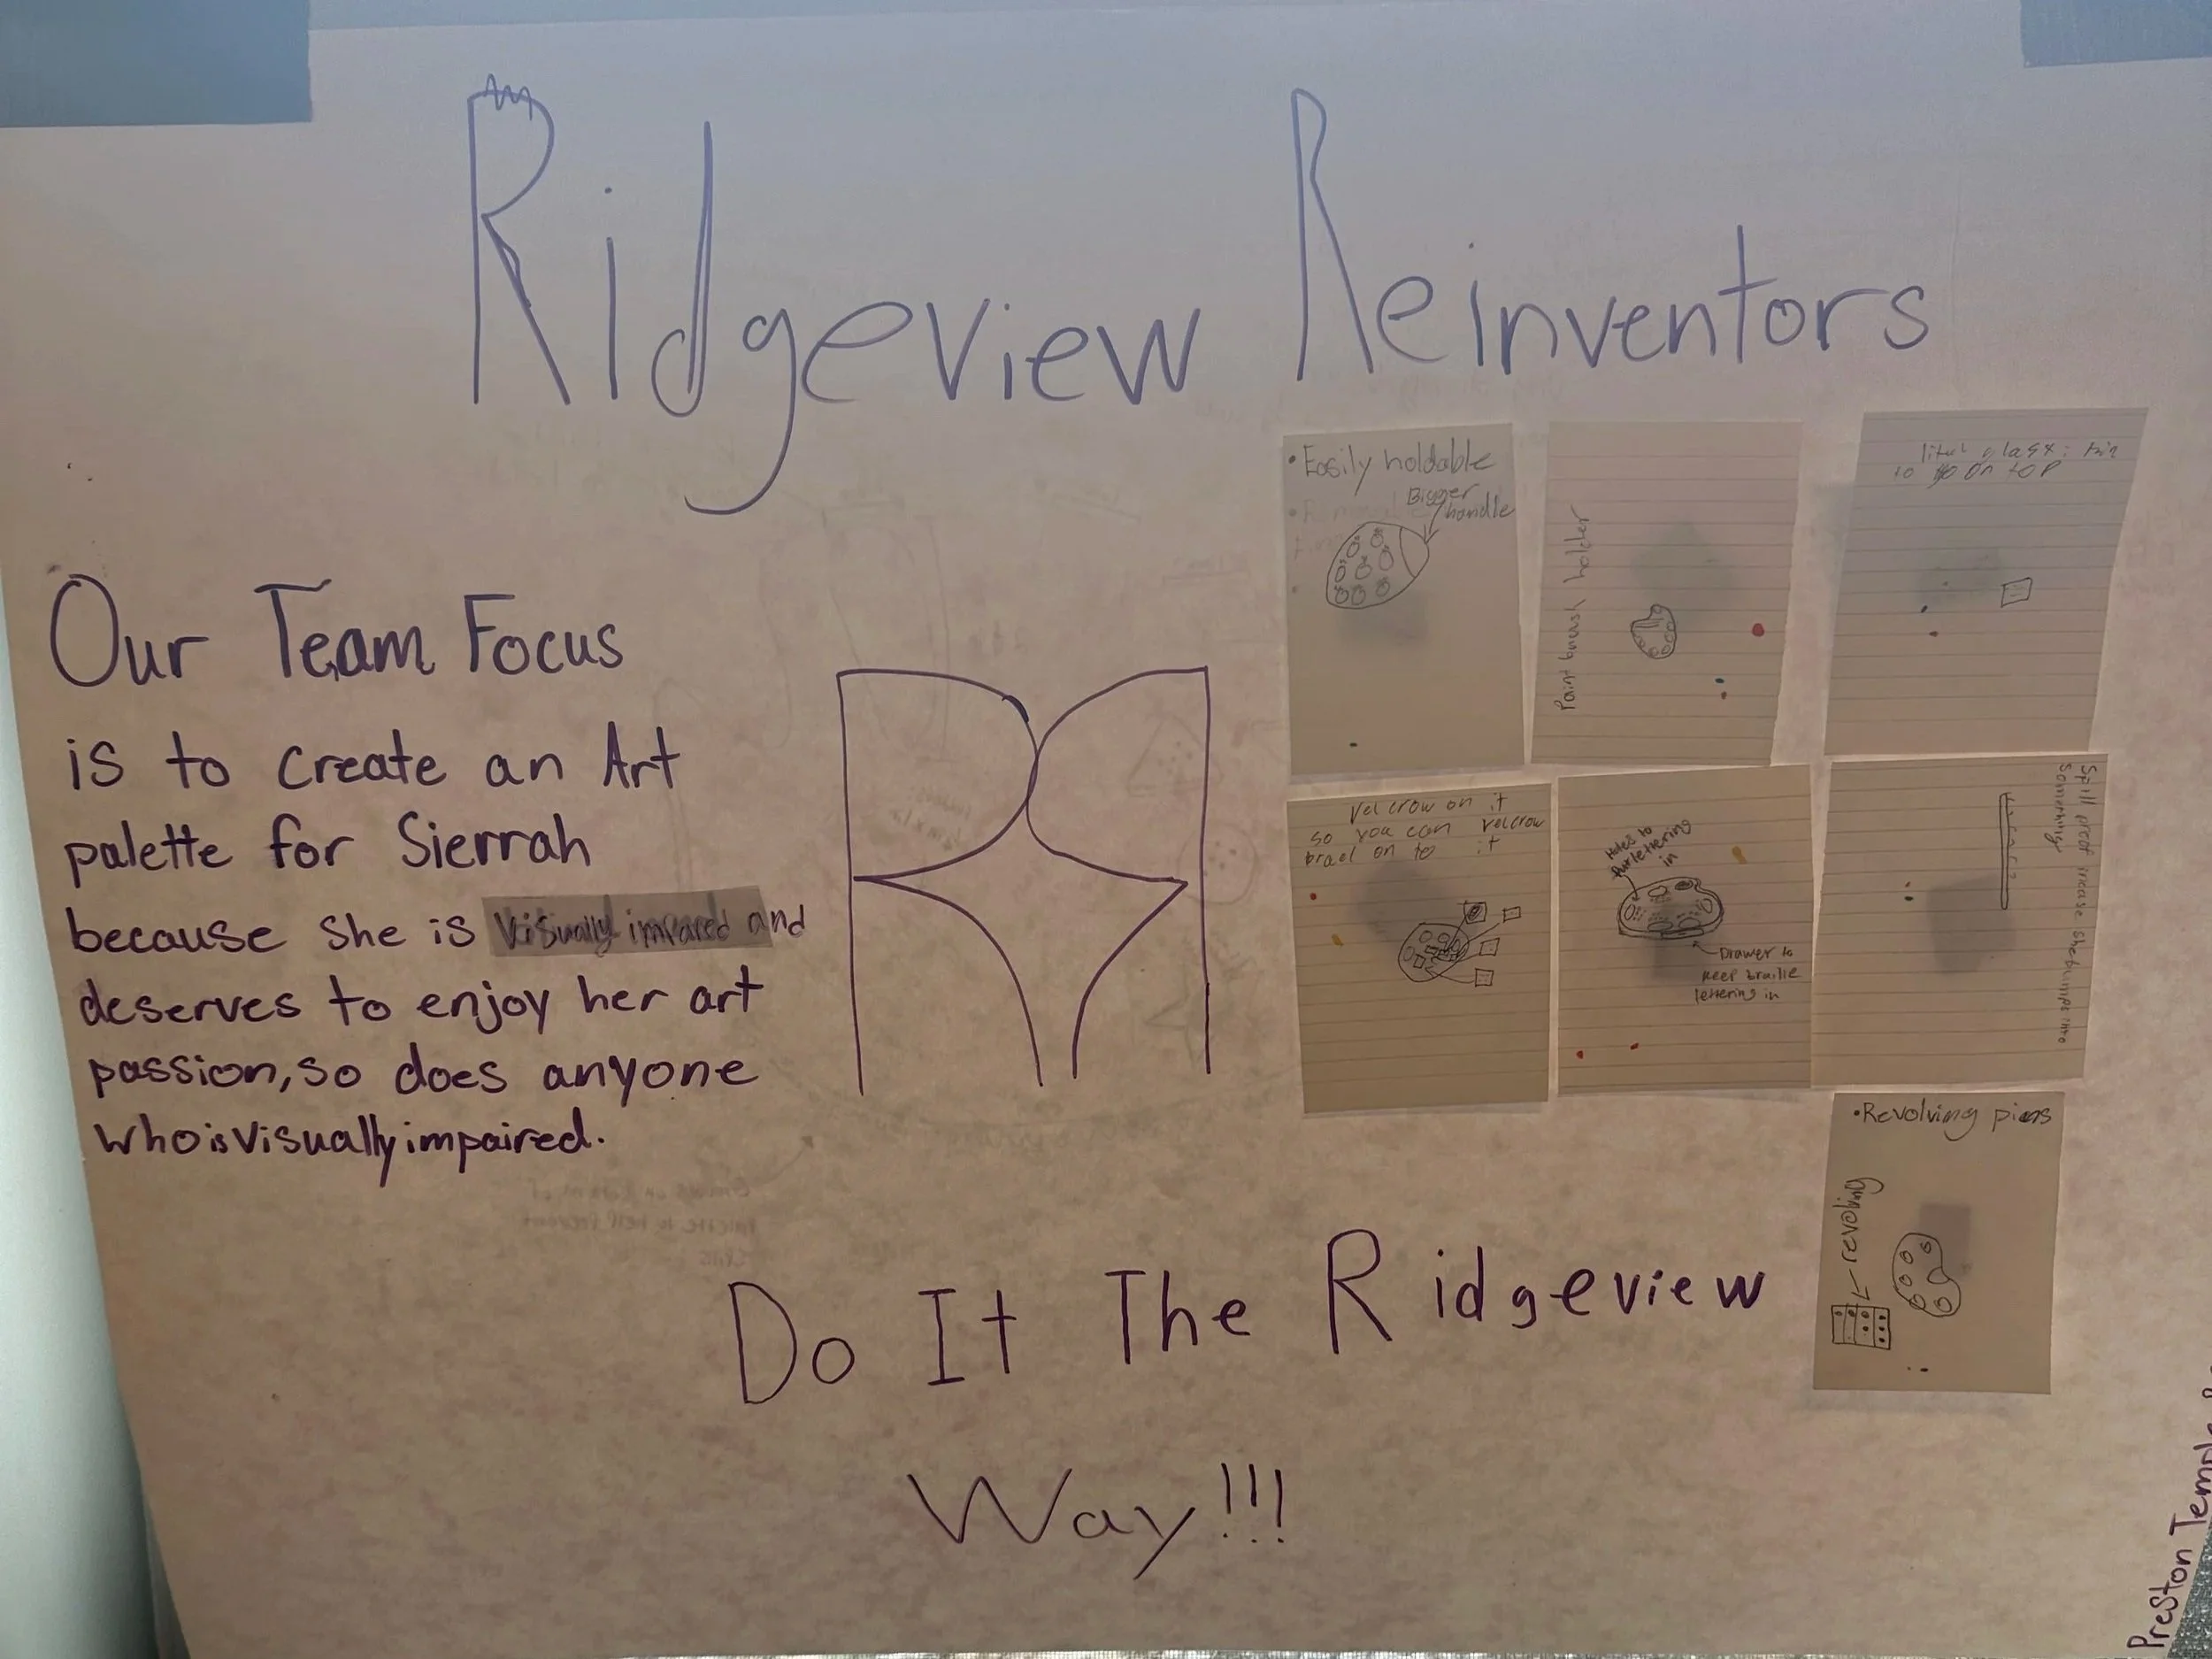
This was the very beginning of our brainstorming, demonstrating our proposal on the left and a few rough draft ideas made by all of us on the right.


Here, we combined our rough draft ideas into one design, incorporating the aspects that we believed would be most useful.

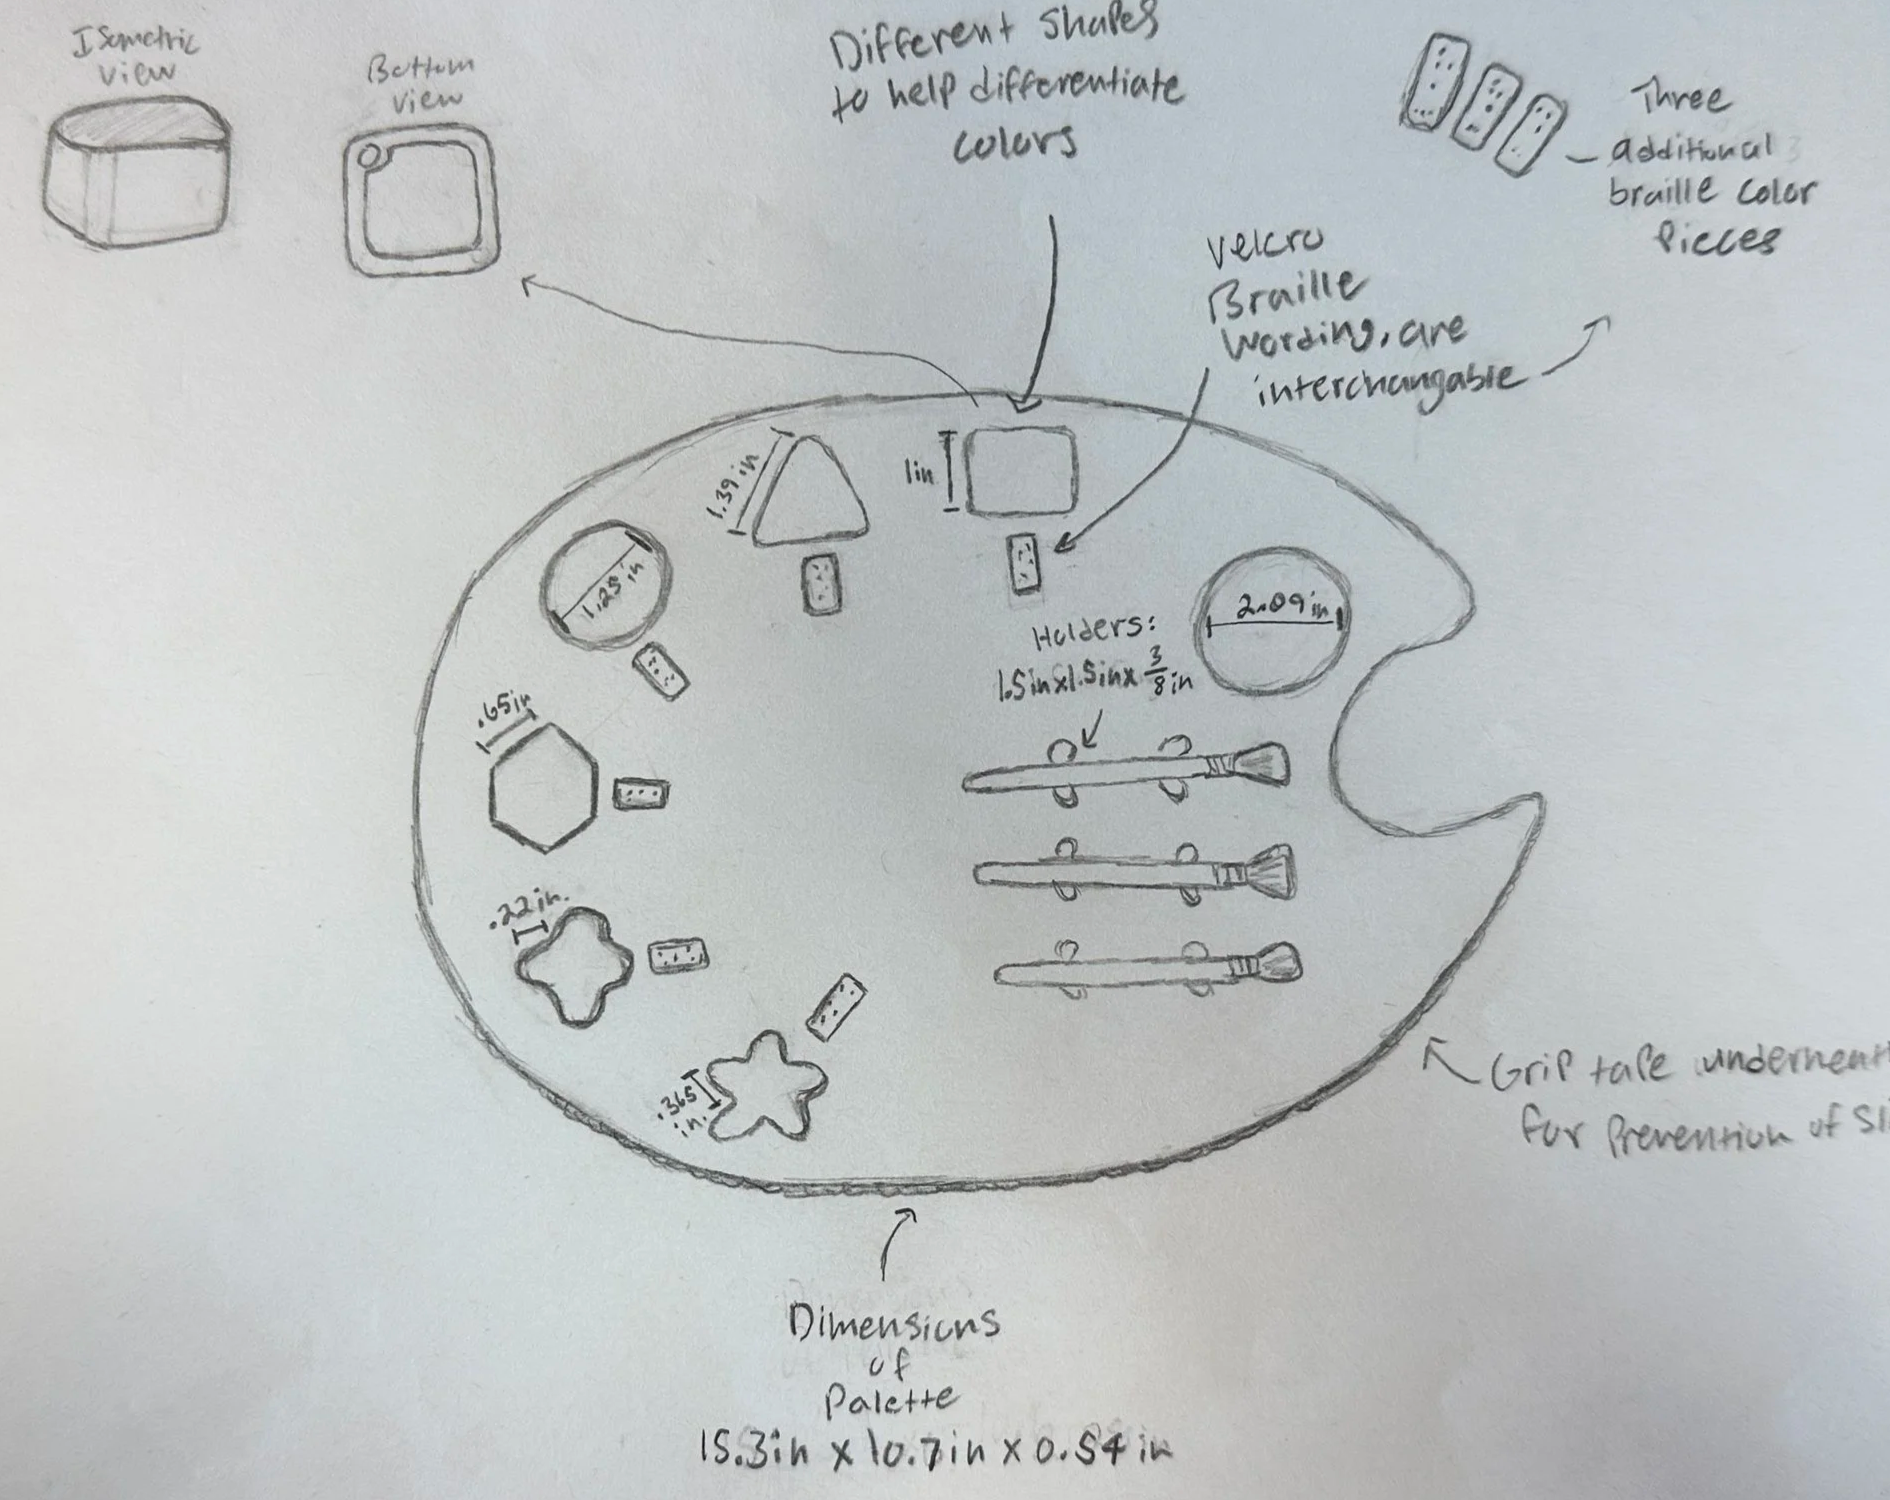
After adding a few more details, we drew the final sketch on the back of our poster.
This was the "Promotional video" of our design, which was sent to Sierrah's parents for approval. My partners were Brady H., Brooks W., Chance L., and Preston T.
Unfortunately, the trimester had come to an end, which meant we would no longer be taking this class, and we were unable to fully complete this project. The rest of my group had decided to go their separate ways and focus on their current classes, but I came in after school and during lunch for the rest of the final trimester to try to finish up as much as I could before giving Sierrah her palette.
In the end, we were able to cut out the palette with the ShopSabre Machine, print out the 3D-designed caps that went along with it, and apply the mat underneath. This was the farthest we could go with the time we were given. Because there was so much more to do and improve on with this project, I decided I would redo this project the following year.
The Redesign process - Junior year
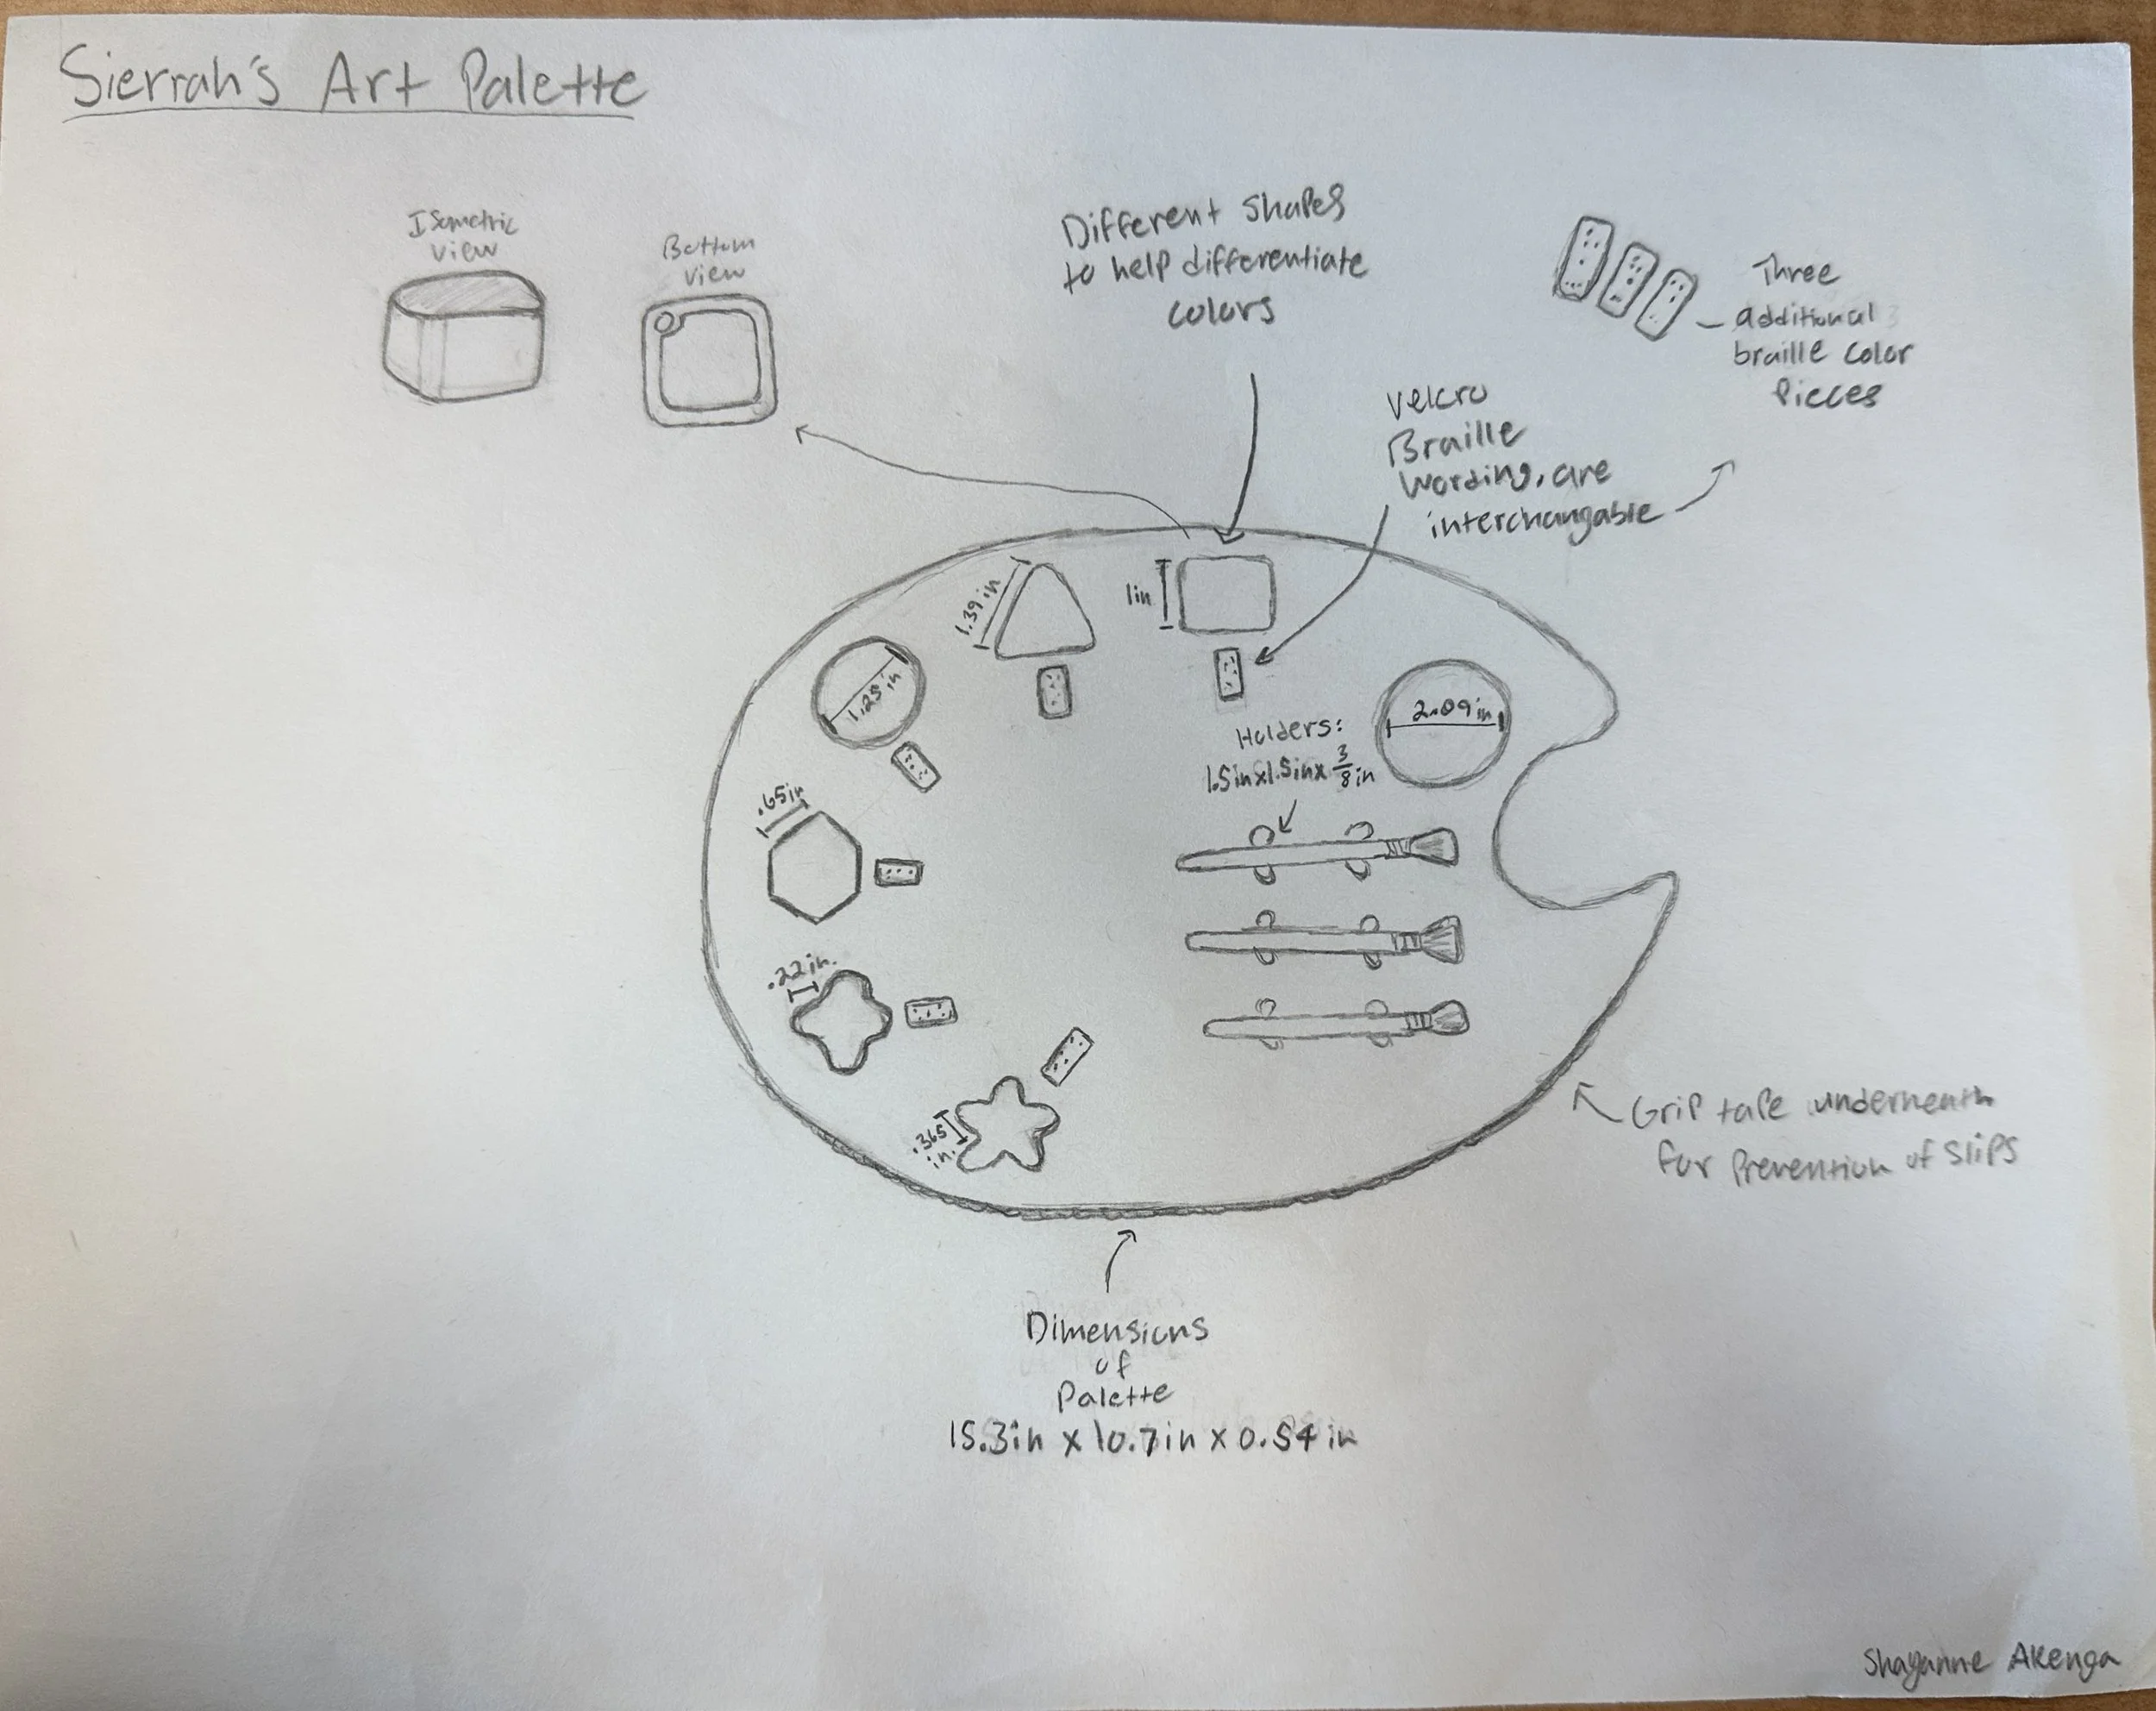
This was my redesign of the final sketch, implementing needed improvements based on the design from last year.
This process was a lot faster since I already had a good foundation to build off of.


This is where all these designs started to develop beyond pencil and paper, the designing and programming for each piece of this project. Multiple days went into some of these, and having them truly come to life was very rewarding. However, thanks to Mr.O’Neill, my team, and the hard work they put in before they resigned, they made this process a lot easier when I decided to take it on by myself.
All of this was created using Fusion 360. Although it was intimidating at first, it’s a software I’ve grown to love through hours of hard work put into it.
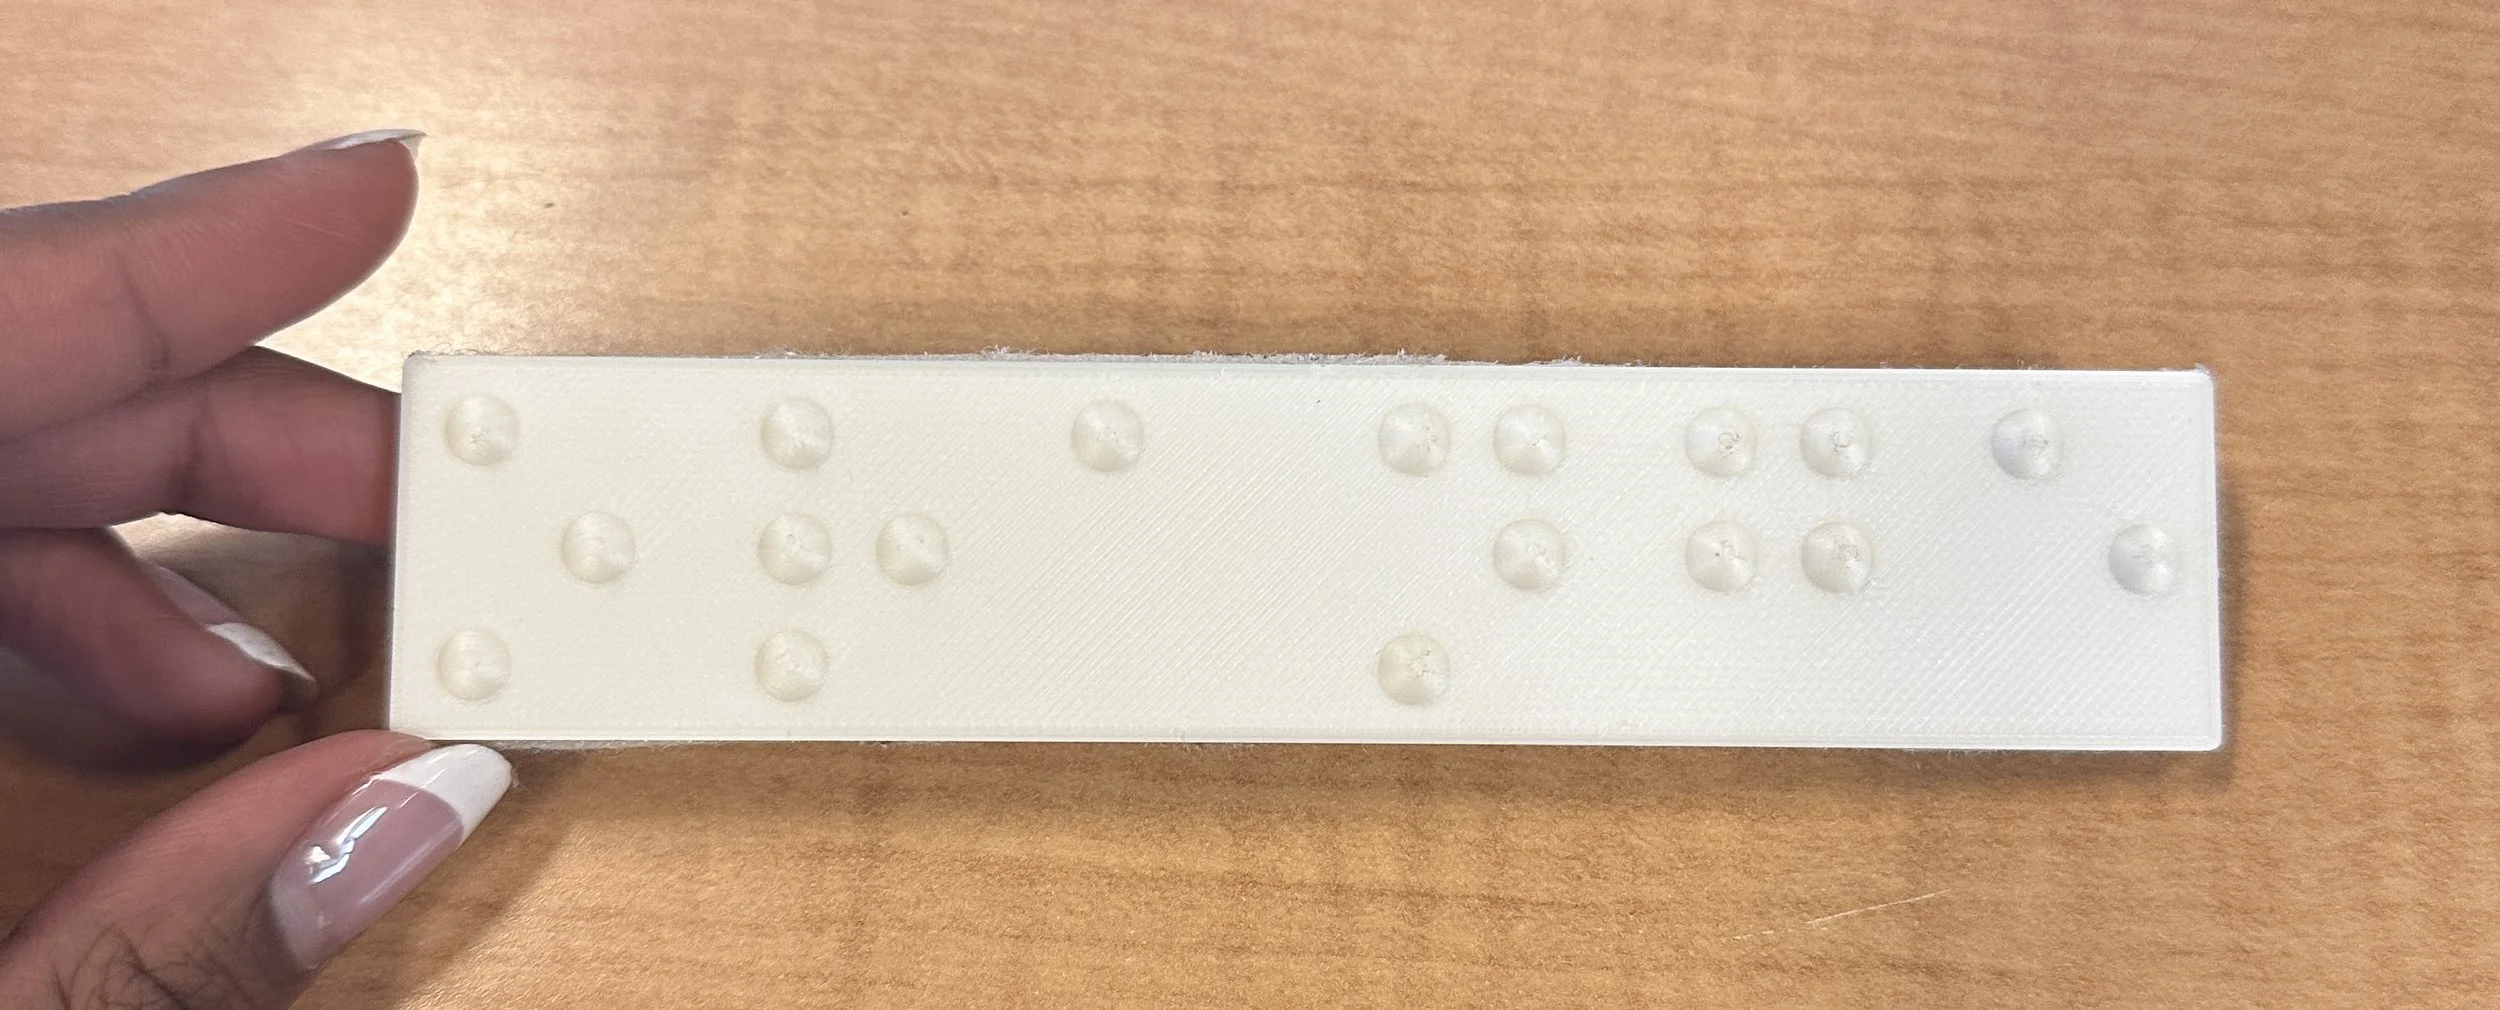
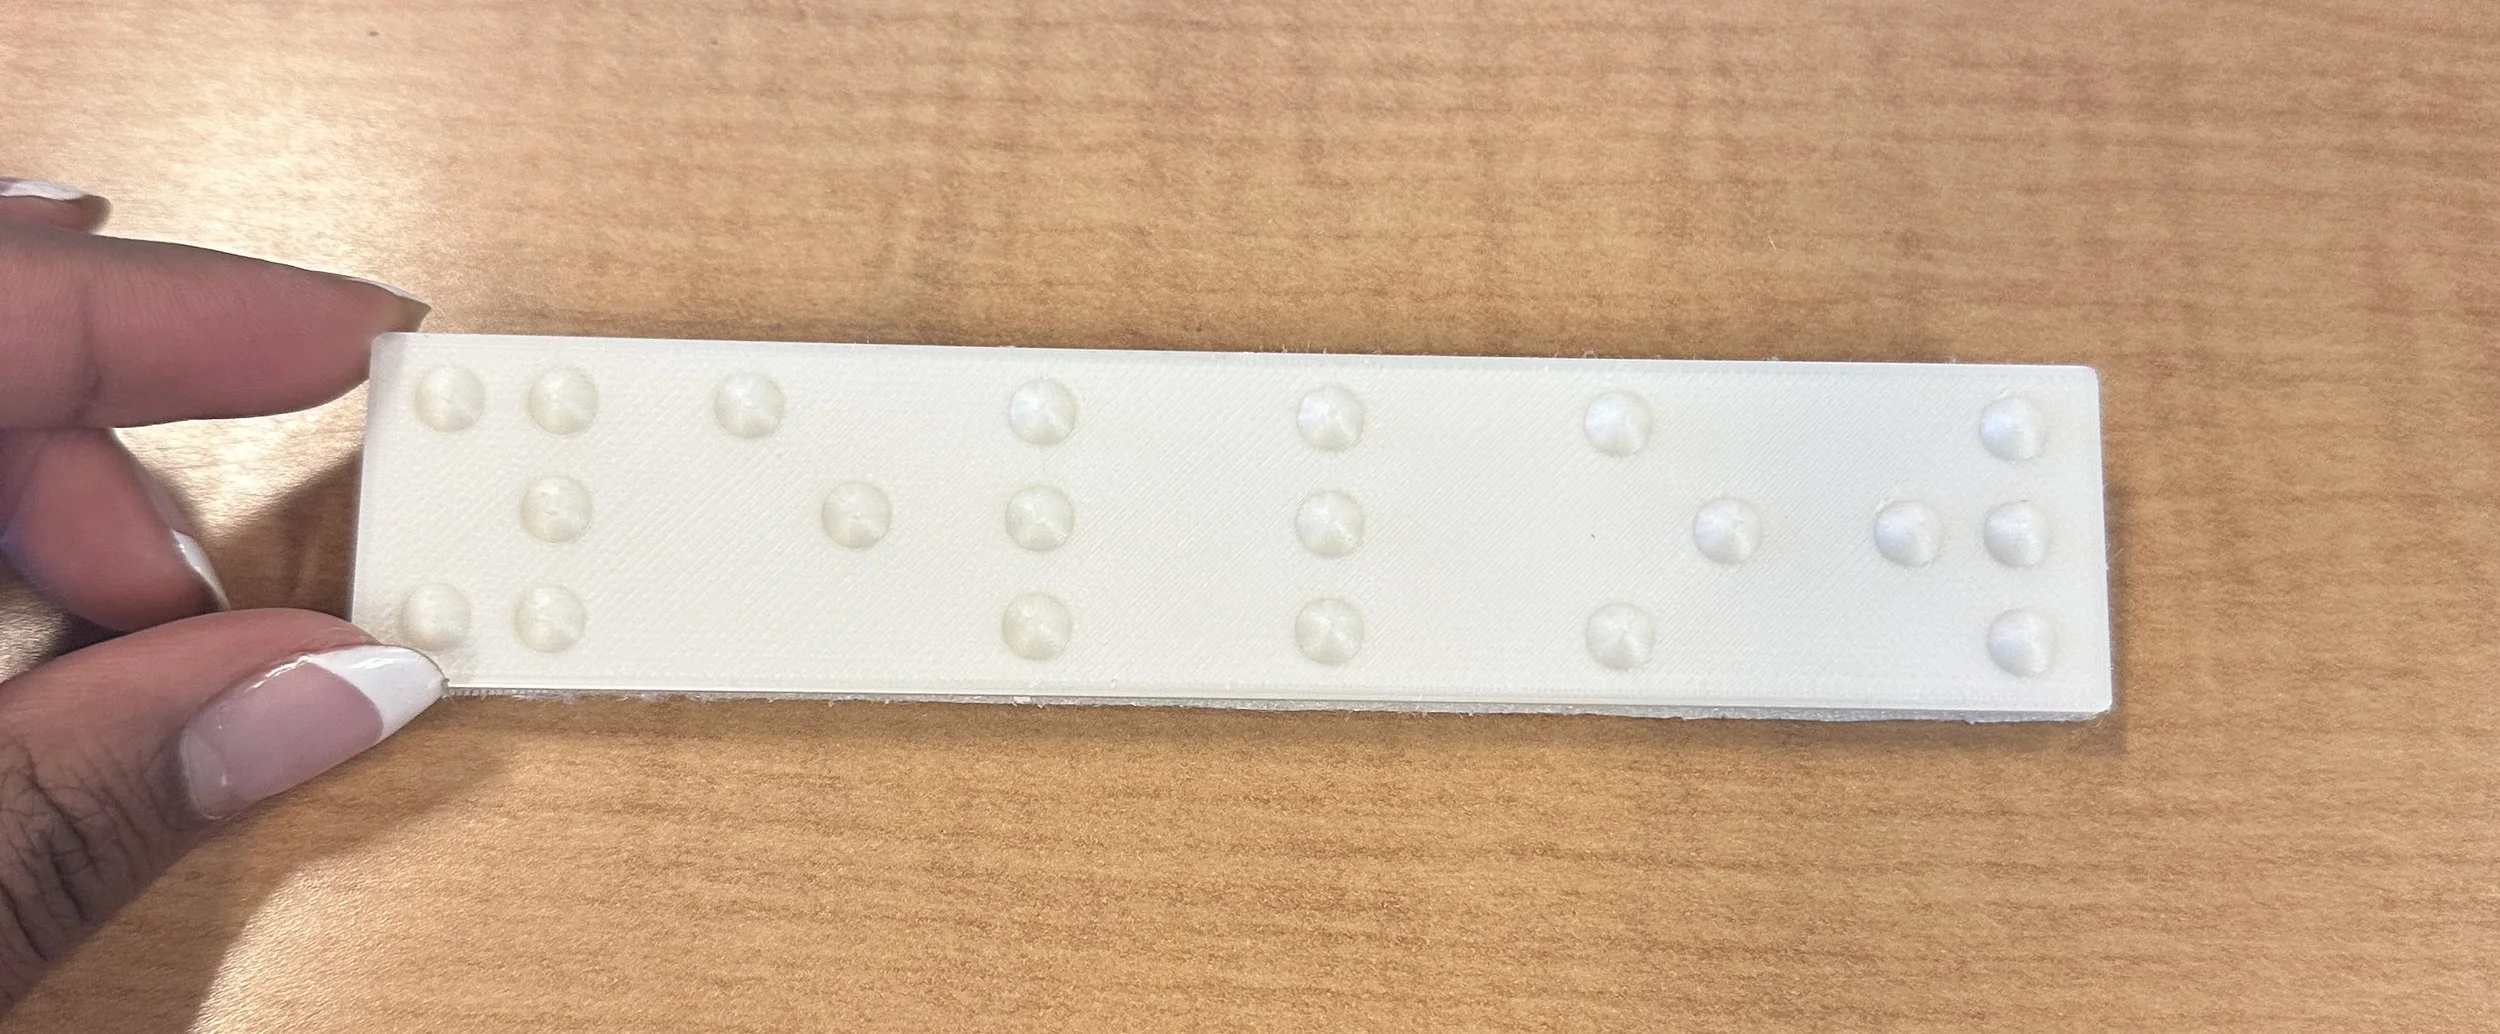
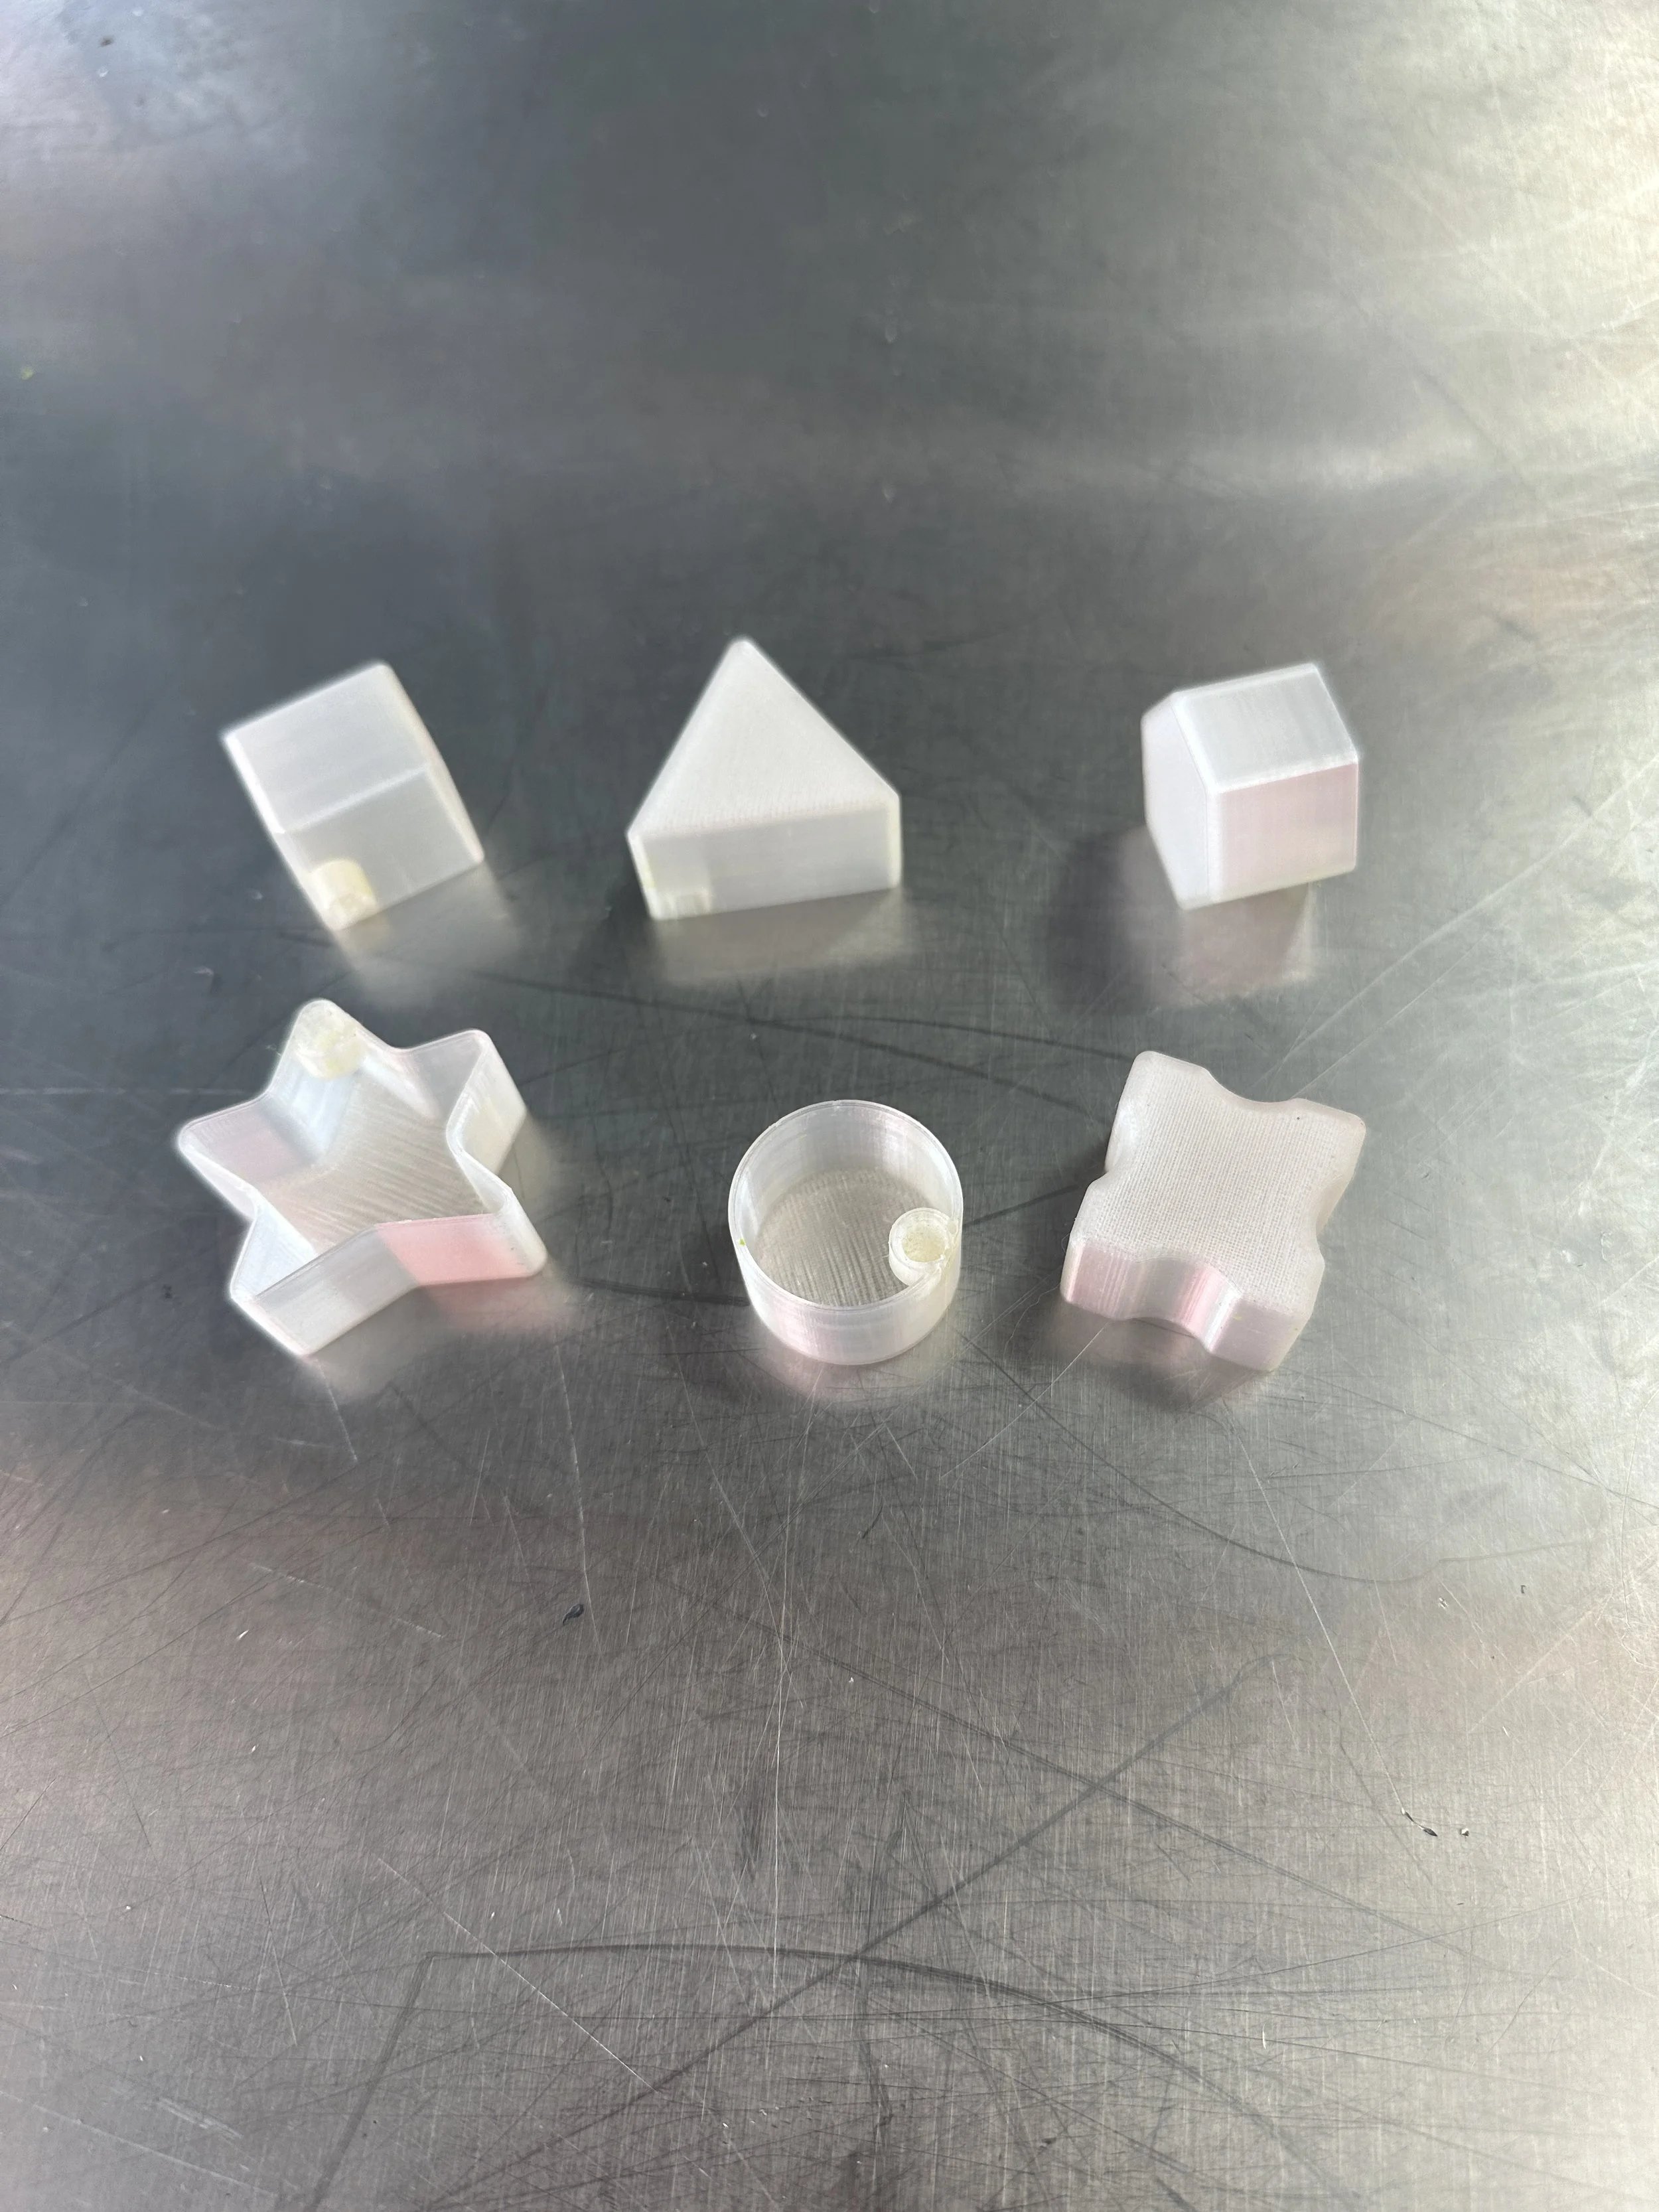
Creating the Braille Pieces
After finalizing the digital designs, I began by printing out the braille pieces. I designed each of these pieces on a 3D design software called Fusion 360. To make sure there were no mistakes in this process, I printed out a test piece of the color red in a lower quality. Once I realized everything turned out how it was supposed to, I began printing out the rest in the highest quality.

Quality Comparison of the Material Used

Overall, I printed nine colors: red, orange, yellow, green, blue, purple, pink, black, and white. (Some appear to be lower quality due to classroom supply running low).

Green Braille Piece
Orange Braille Piece
Yellow Braille Piece

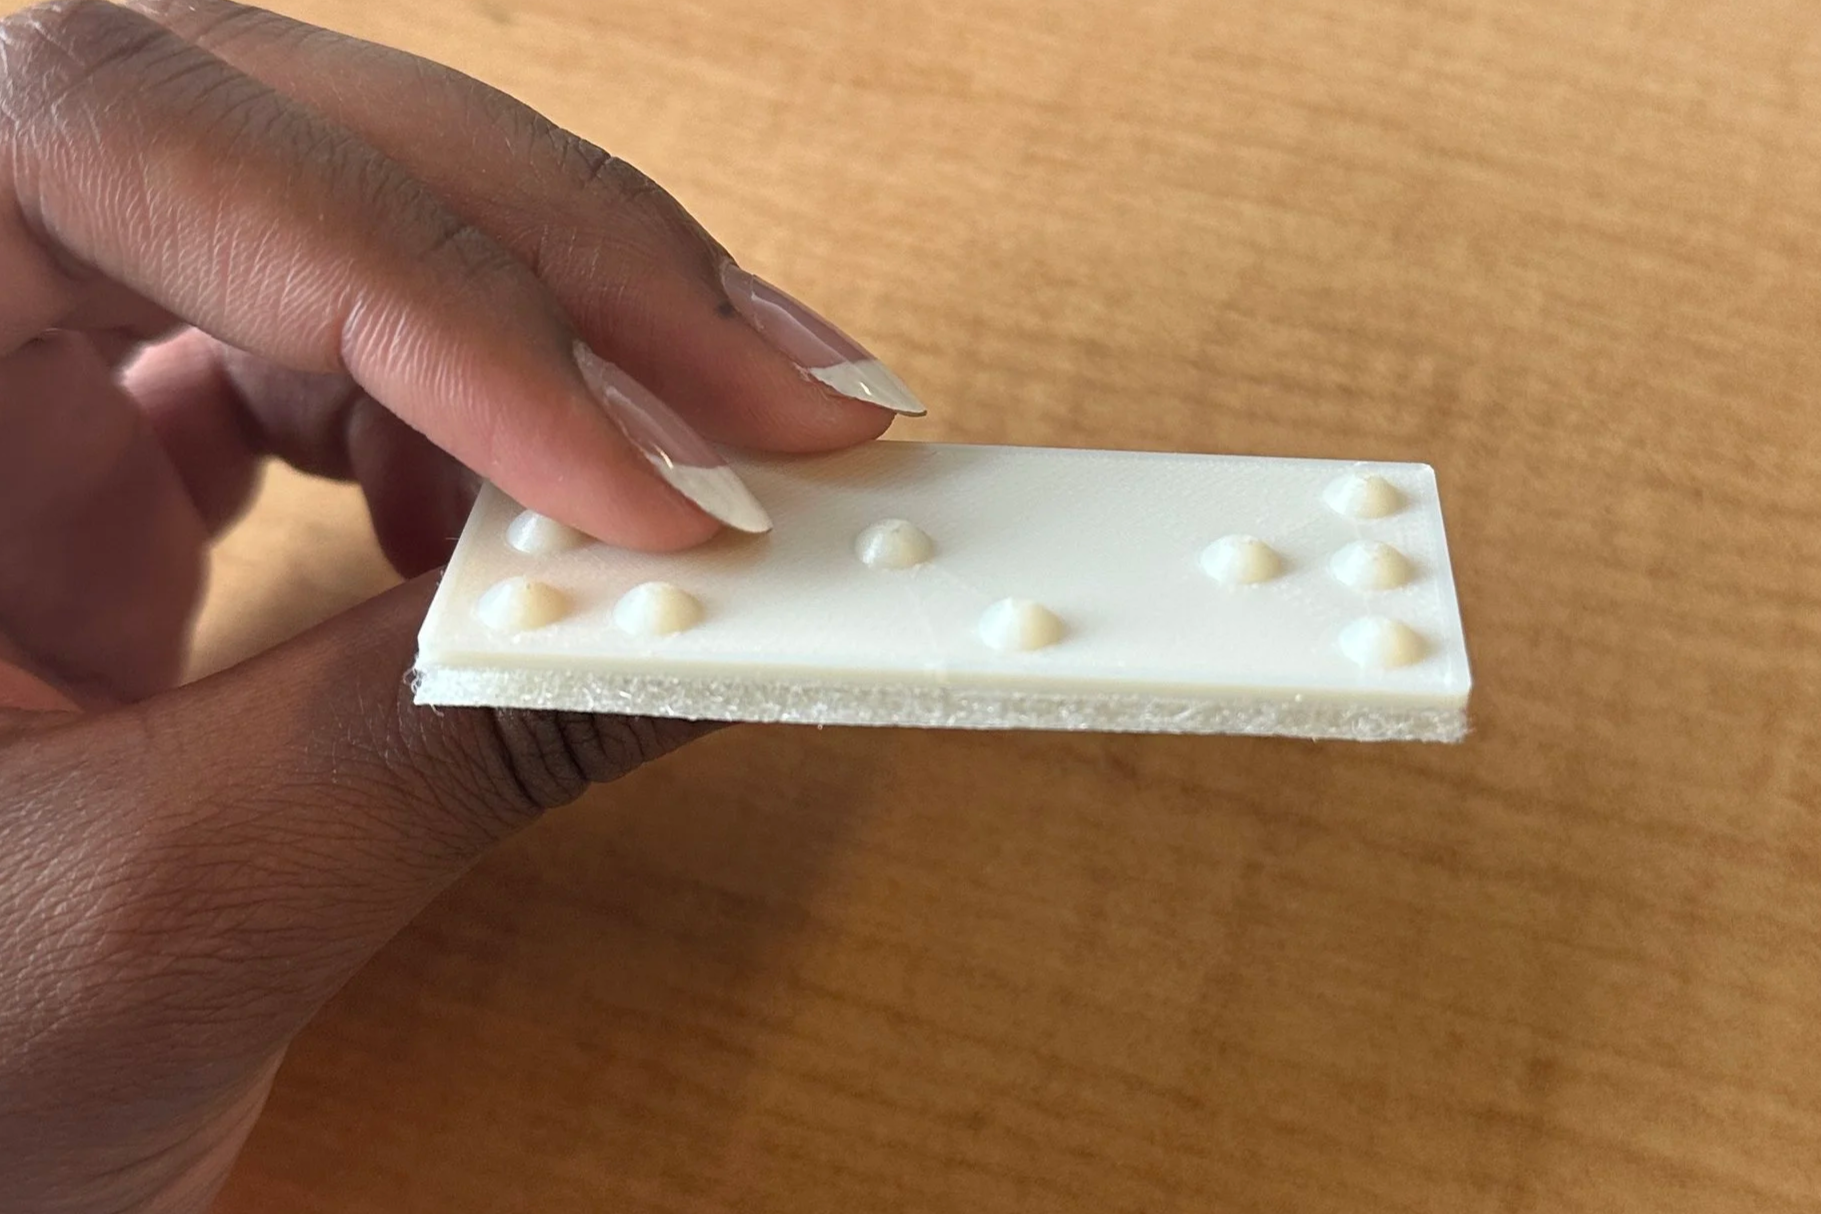

This is where I started adding the adhesive Velcro underneath the braille pieces. These will attach to the palette and will allow Sierrah to interchange colors.
Creating the Paint Caps
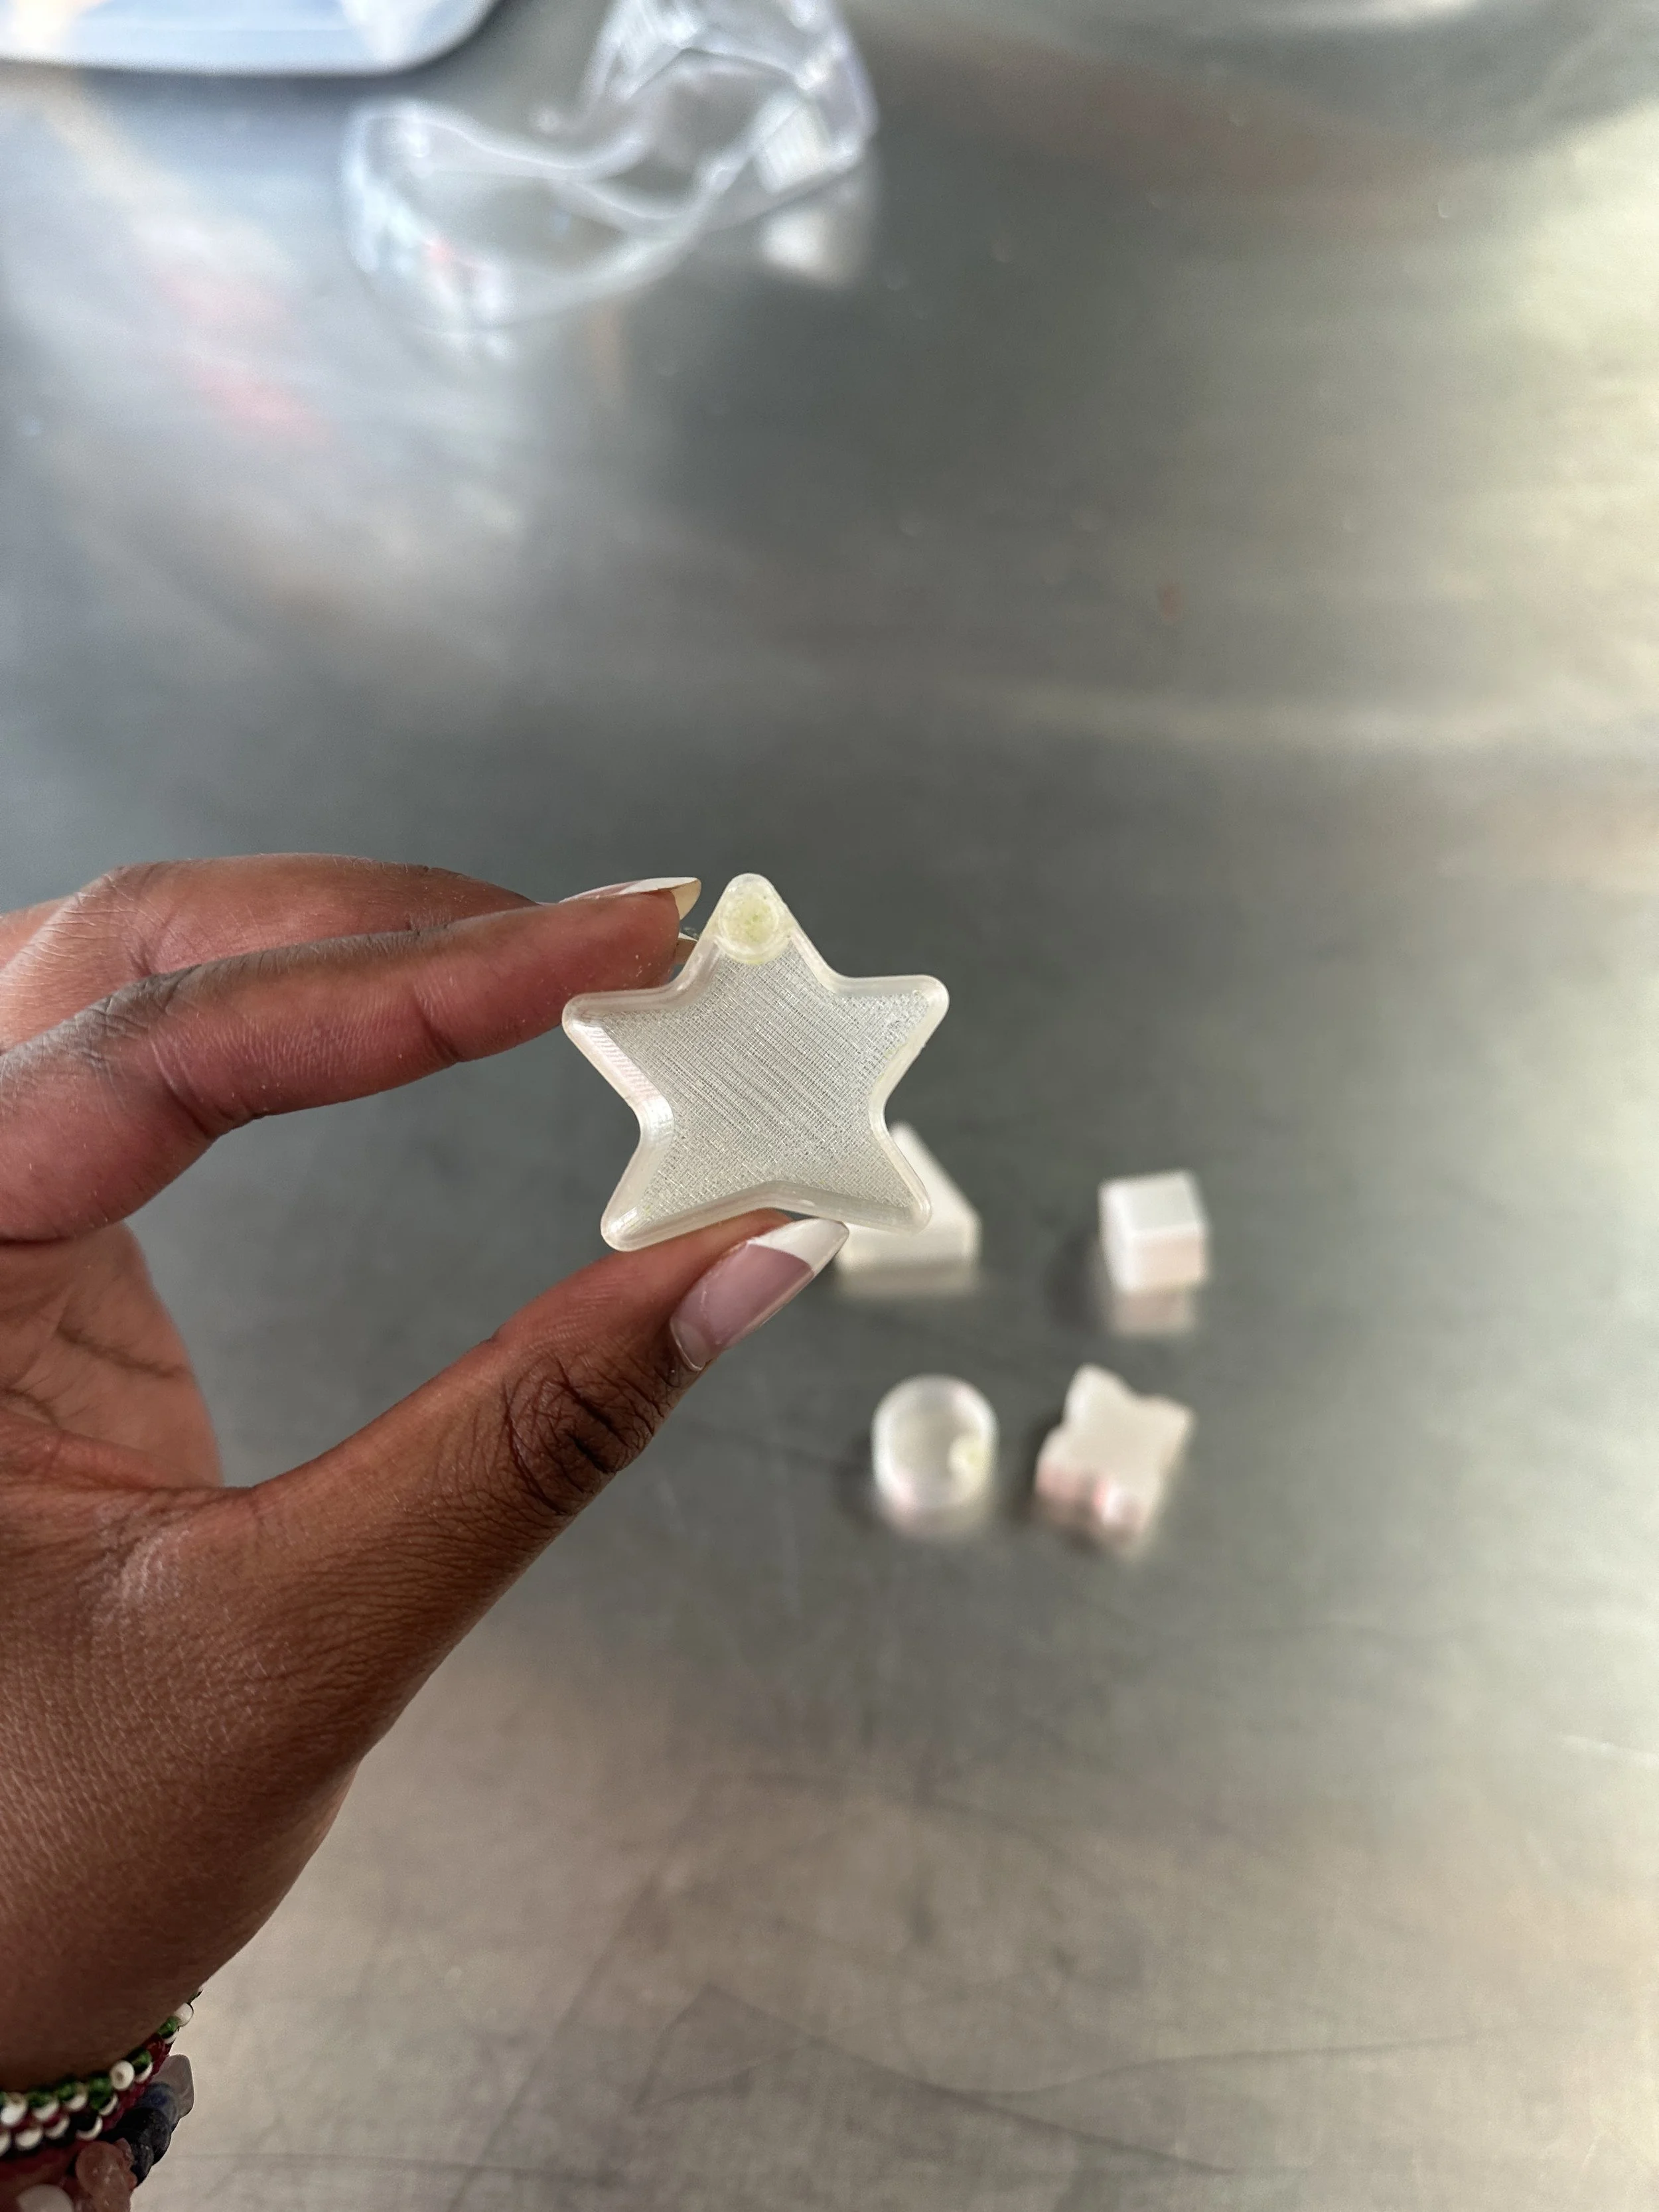

This was the finished product of the 3D-printed caps. I didn't need to do a test run for these since we had used the same file of the successful pieces from last year.
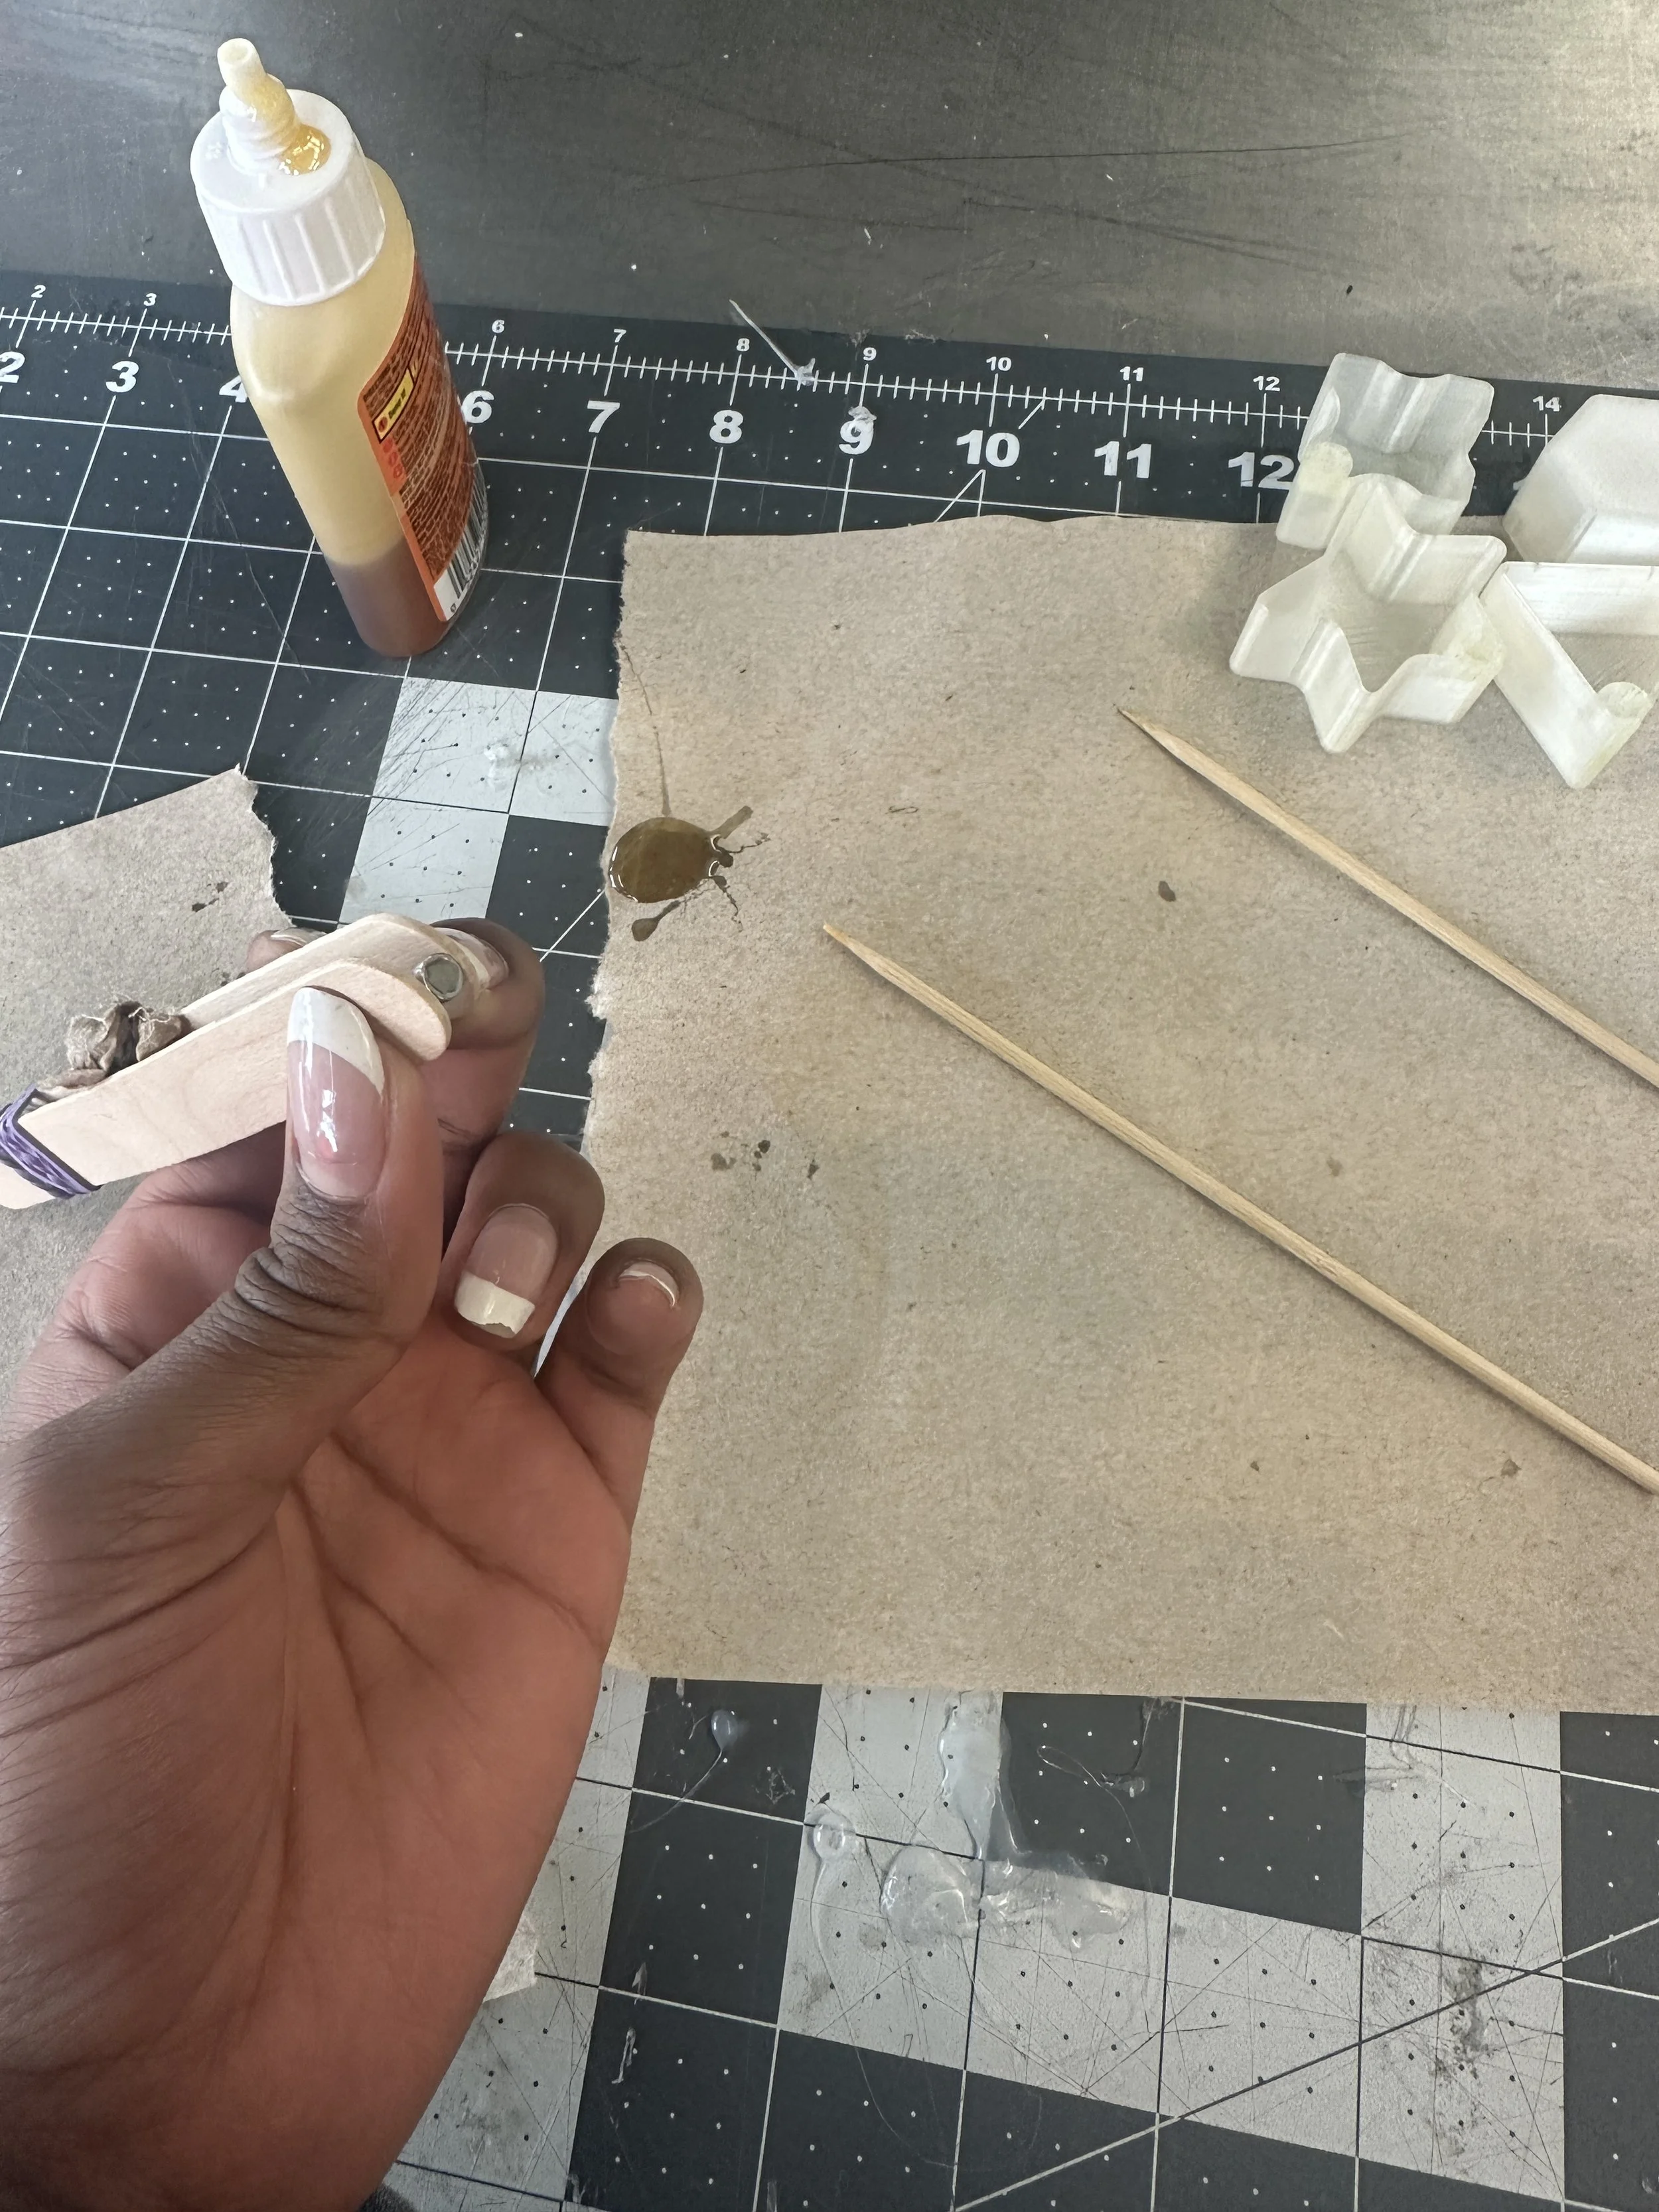
I had a few bad attempts at inserting the magnets into the caps. I used Gorilla Glue to do this, but when it dries, it expands by quite a bit. I had to really be careful not to put in too much glue without it protruding the magnets too much, but just enough so that it would stick. On the other hand, these magnets are very tiny, so it was hard to apply the glue and insert them into the hole without them slipping out of my hands. I tried using different types of pliers, but they were all made of metal, and the magnets ended up going everywhere I didn't want them to. This led me to make this new tool with two popsicle sticks, and it worked out great!
Cutting out the art palette...
A tedious, but fun learning experience!
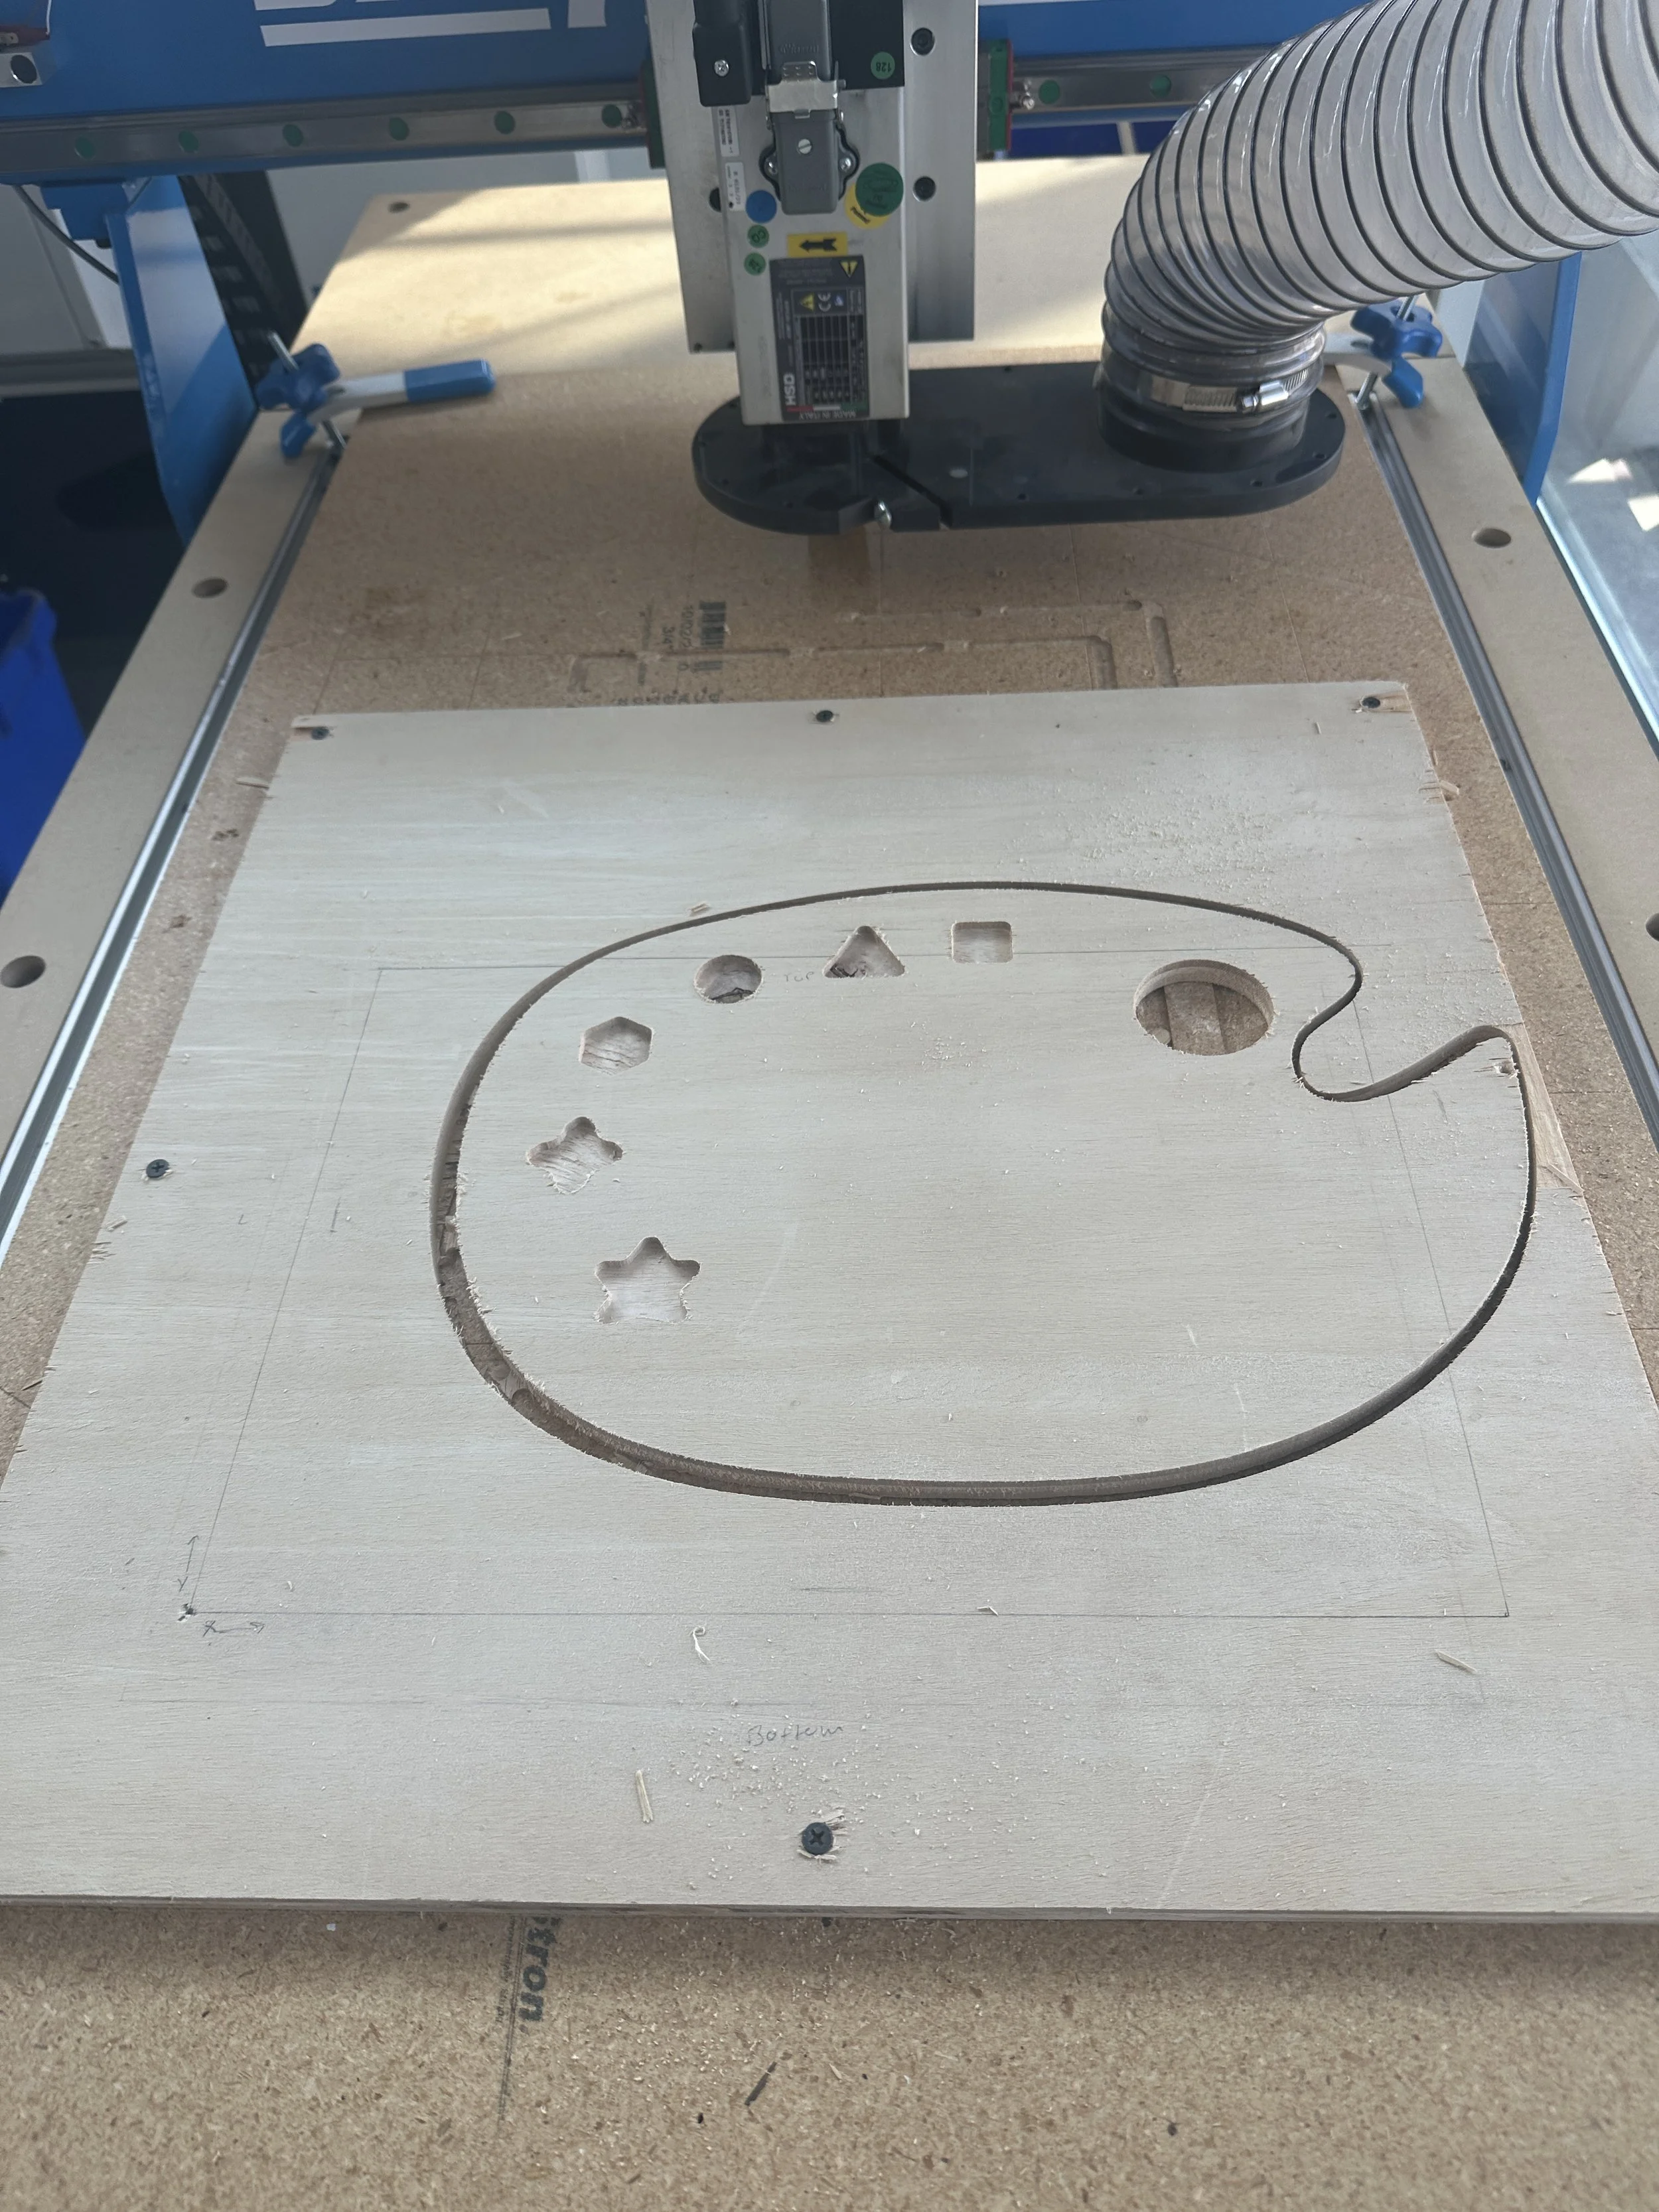
When beginning the cutout of the palette, it did take me a while to fully learn how to use the ShopSabre. It is a very heavy-duty machine compared to the others that I've worked with, so I was very cautious. The palette as a whole requires three different operations that require three different tools. It took a total of three attempts on three different wood pieces to get the final product. However, the upside to this was that I got a lot of practice with the machine, building my confidence with each step to a point where I could mentor others on how to use it.
Failed Attempts
-
![]()
First failed attempt
This is the first failed attempt. I had completed the first operation and everything had turned out great, but the issue came from trying to start the second operation. When trying to run it, there was an issue with its z-coordinate. To try to figure out the issue, we took off the tool and ran the operation again to get a better view of the issue. However, it had worked correctly this time, and the machine ran into the wood, creating that dark mark you can see on the circle cutout. This mark had run too deep into the wood, so it wasn't a fixable issue.
-
![]()
Second failed attempt (1)
This was the second failed attempt. When designing the palette on Fusion 360, I hadn't aligned the stock on Fusion with the stock in real life. This mistake caused the palette to be cut off-center and into a hole where one of the screws would've been. The goal was for it to be cut within the pencil-outlined box. Luckily, Mr.O'Neill had recognized this while watching over and took out the screw before the tool cut into it.
-
![]()
Second failed attempt (2)
Even if this hadn't happened, the wood was bent, and the palette wouldn't have lain down flat, making it unusable.


Final Product!
The first cut
The tool that was used here is called "The Hog", which is based on the noise it makes when cutting through wood. It's very loud, but it gets the job done well!
The second cut
This was just a practice run-through of operation two to make sure nothing unexpected happened. This is a required step before every operation.

Right before the final run-through
This was just a check to make sure the caps fit well, and they fit perfectly!

Results
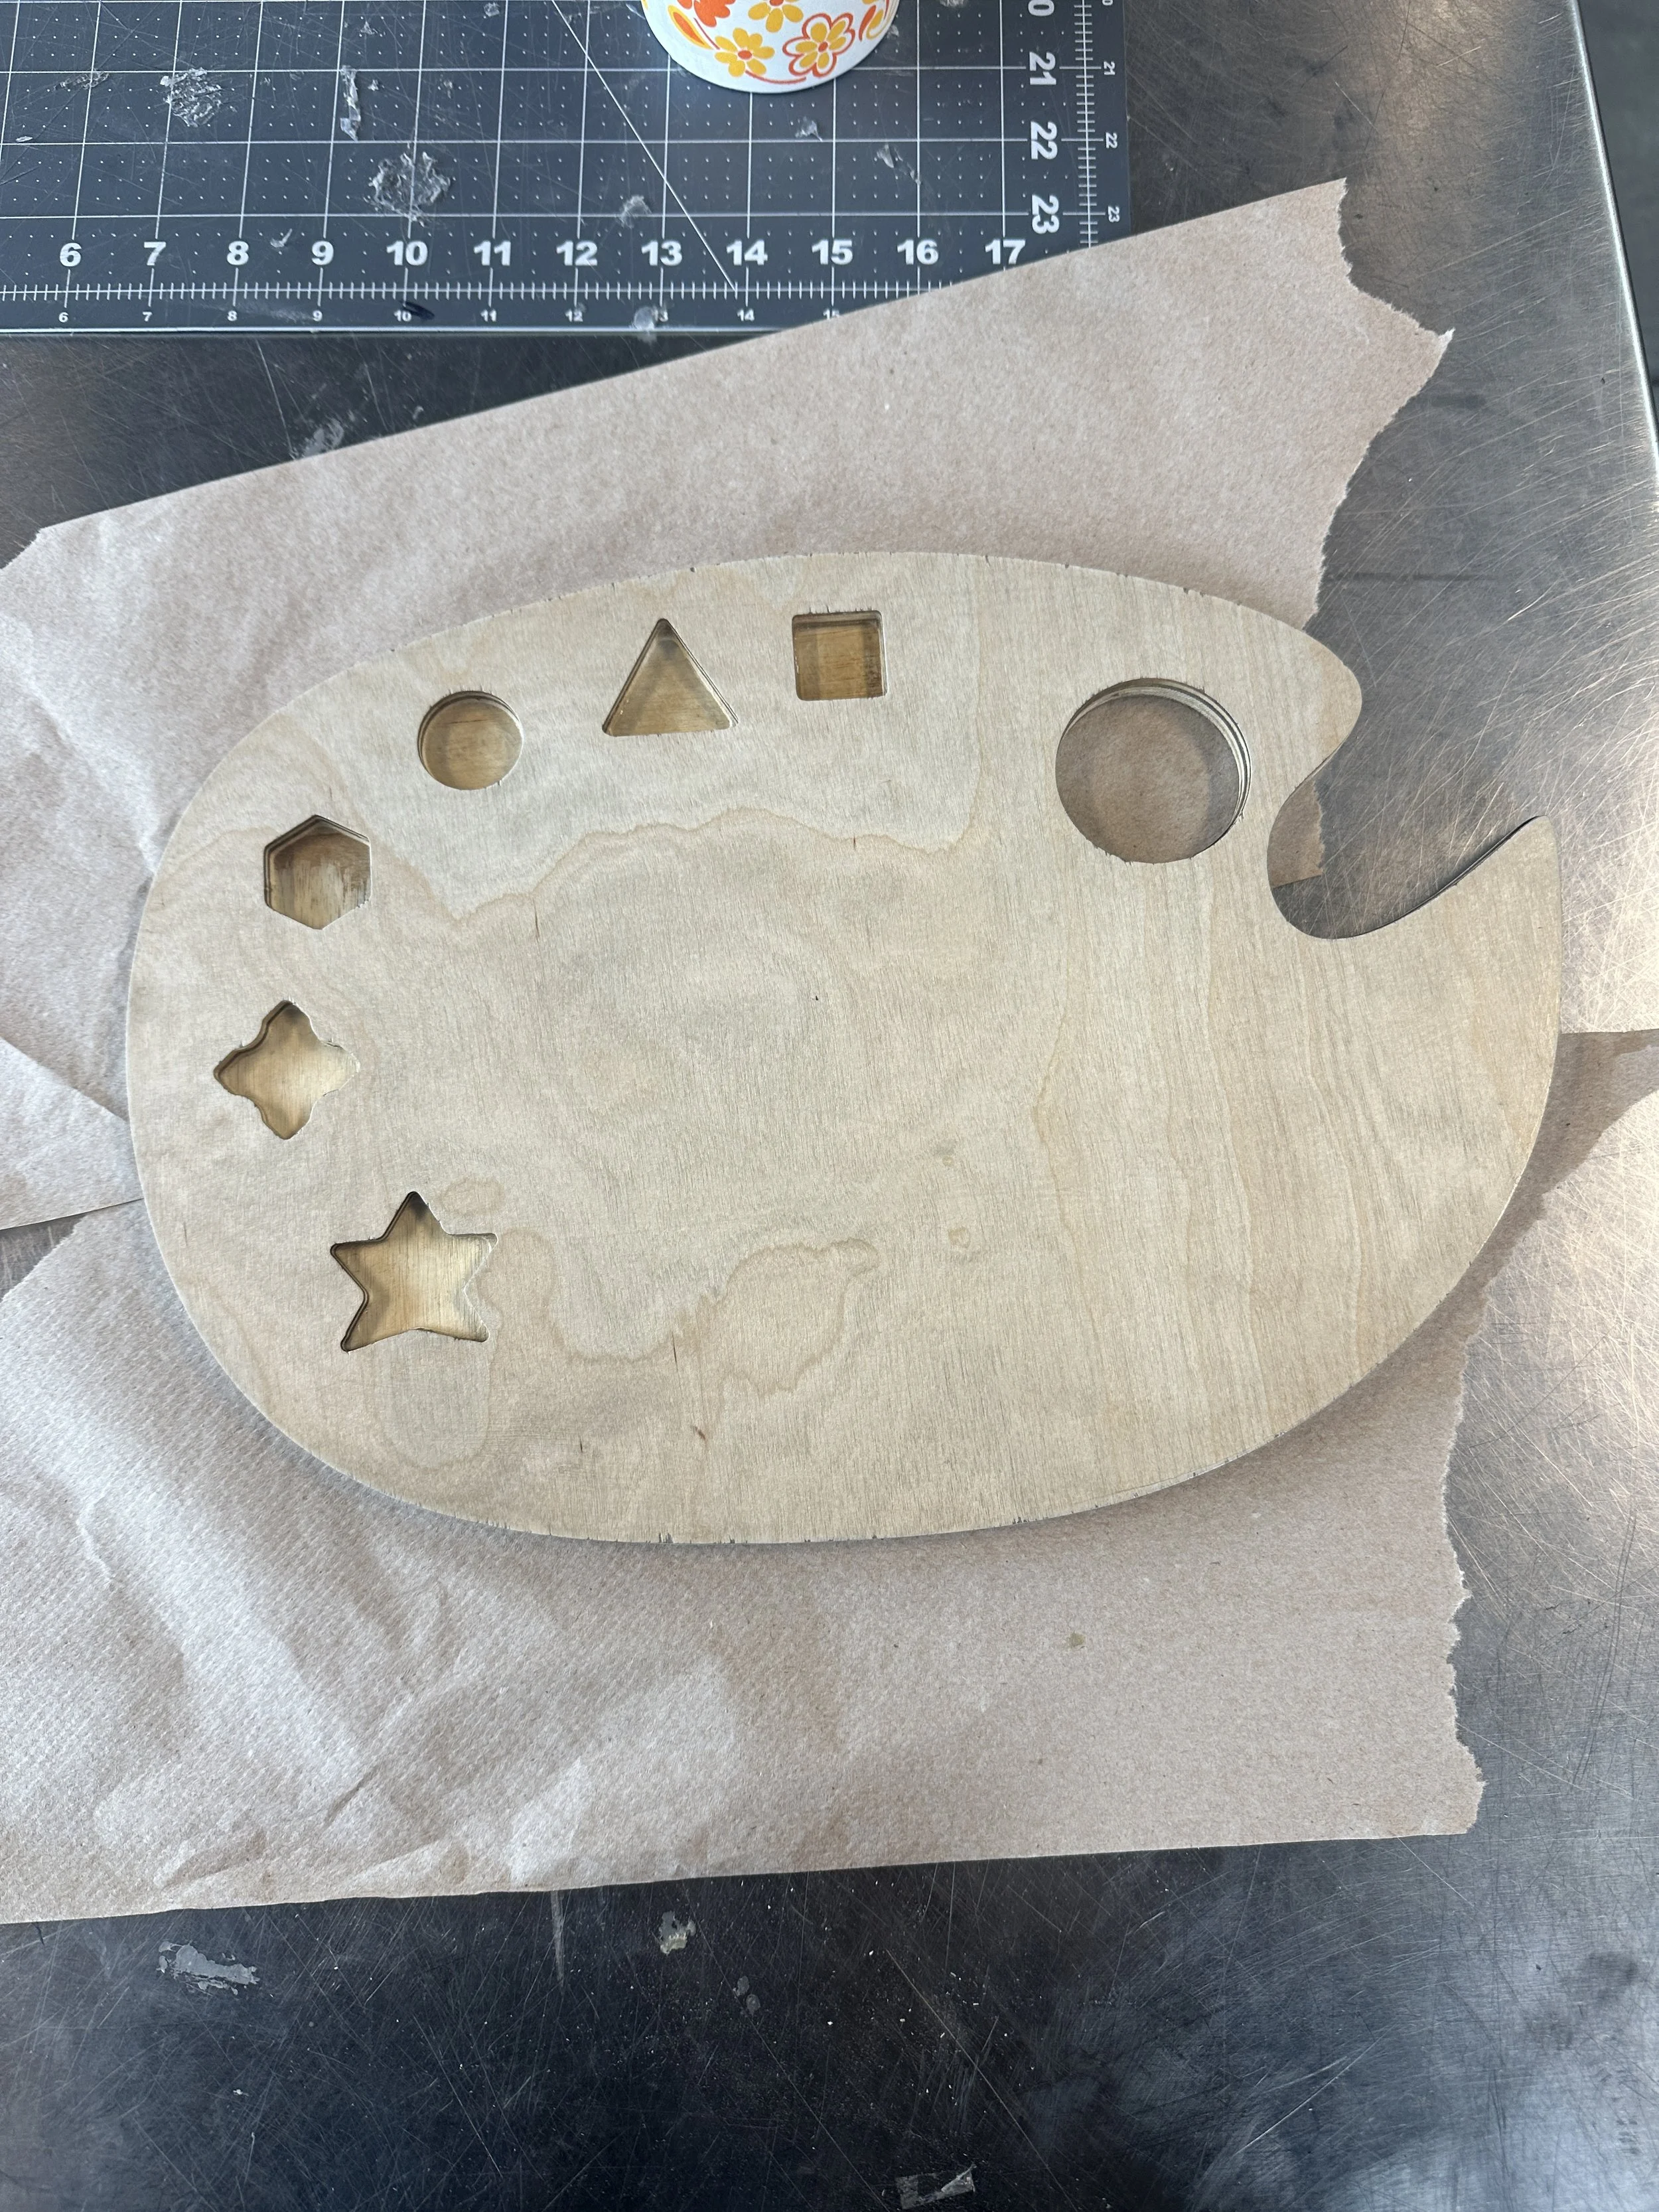
This first cutout turned out great, and it was perfectly within the outline after I made a few adjustments on Fusion 360. This is also a much higher quality piece of wood that Mr.O'Neill supplied for me, helping me ensure that this project turns out the best it can be.

Results
This second cut focused on fixing the edges and rounding out the shapes.
Final Results
I didn't get a video of the last cut because it was a very short operation that just focused on cleaning up the edges. I was very happy with how it turned out, and I started the next part of the process immediately.

Comparison of all three palettes
The final product is on the left, the first attempt is in the middle, and the second attempt is on the right. If you look closely, you can clearly distinguish the difference in quality between the failed attempts and the final product.
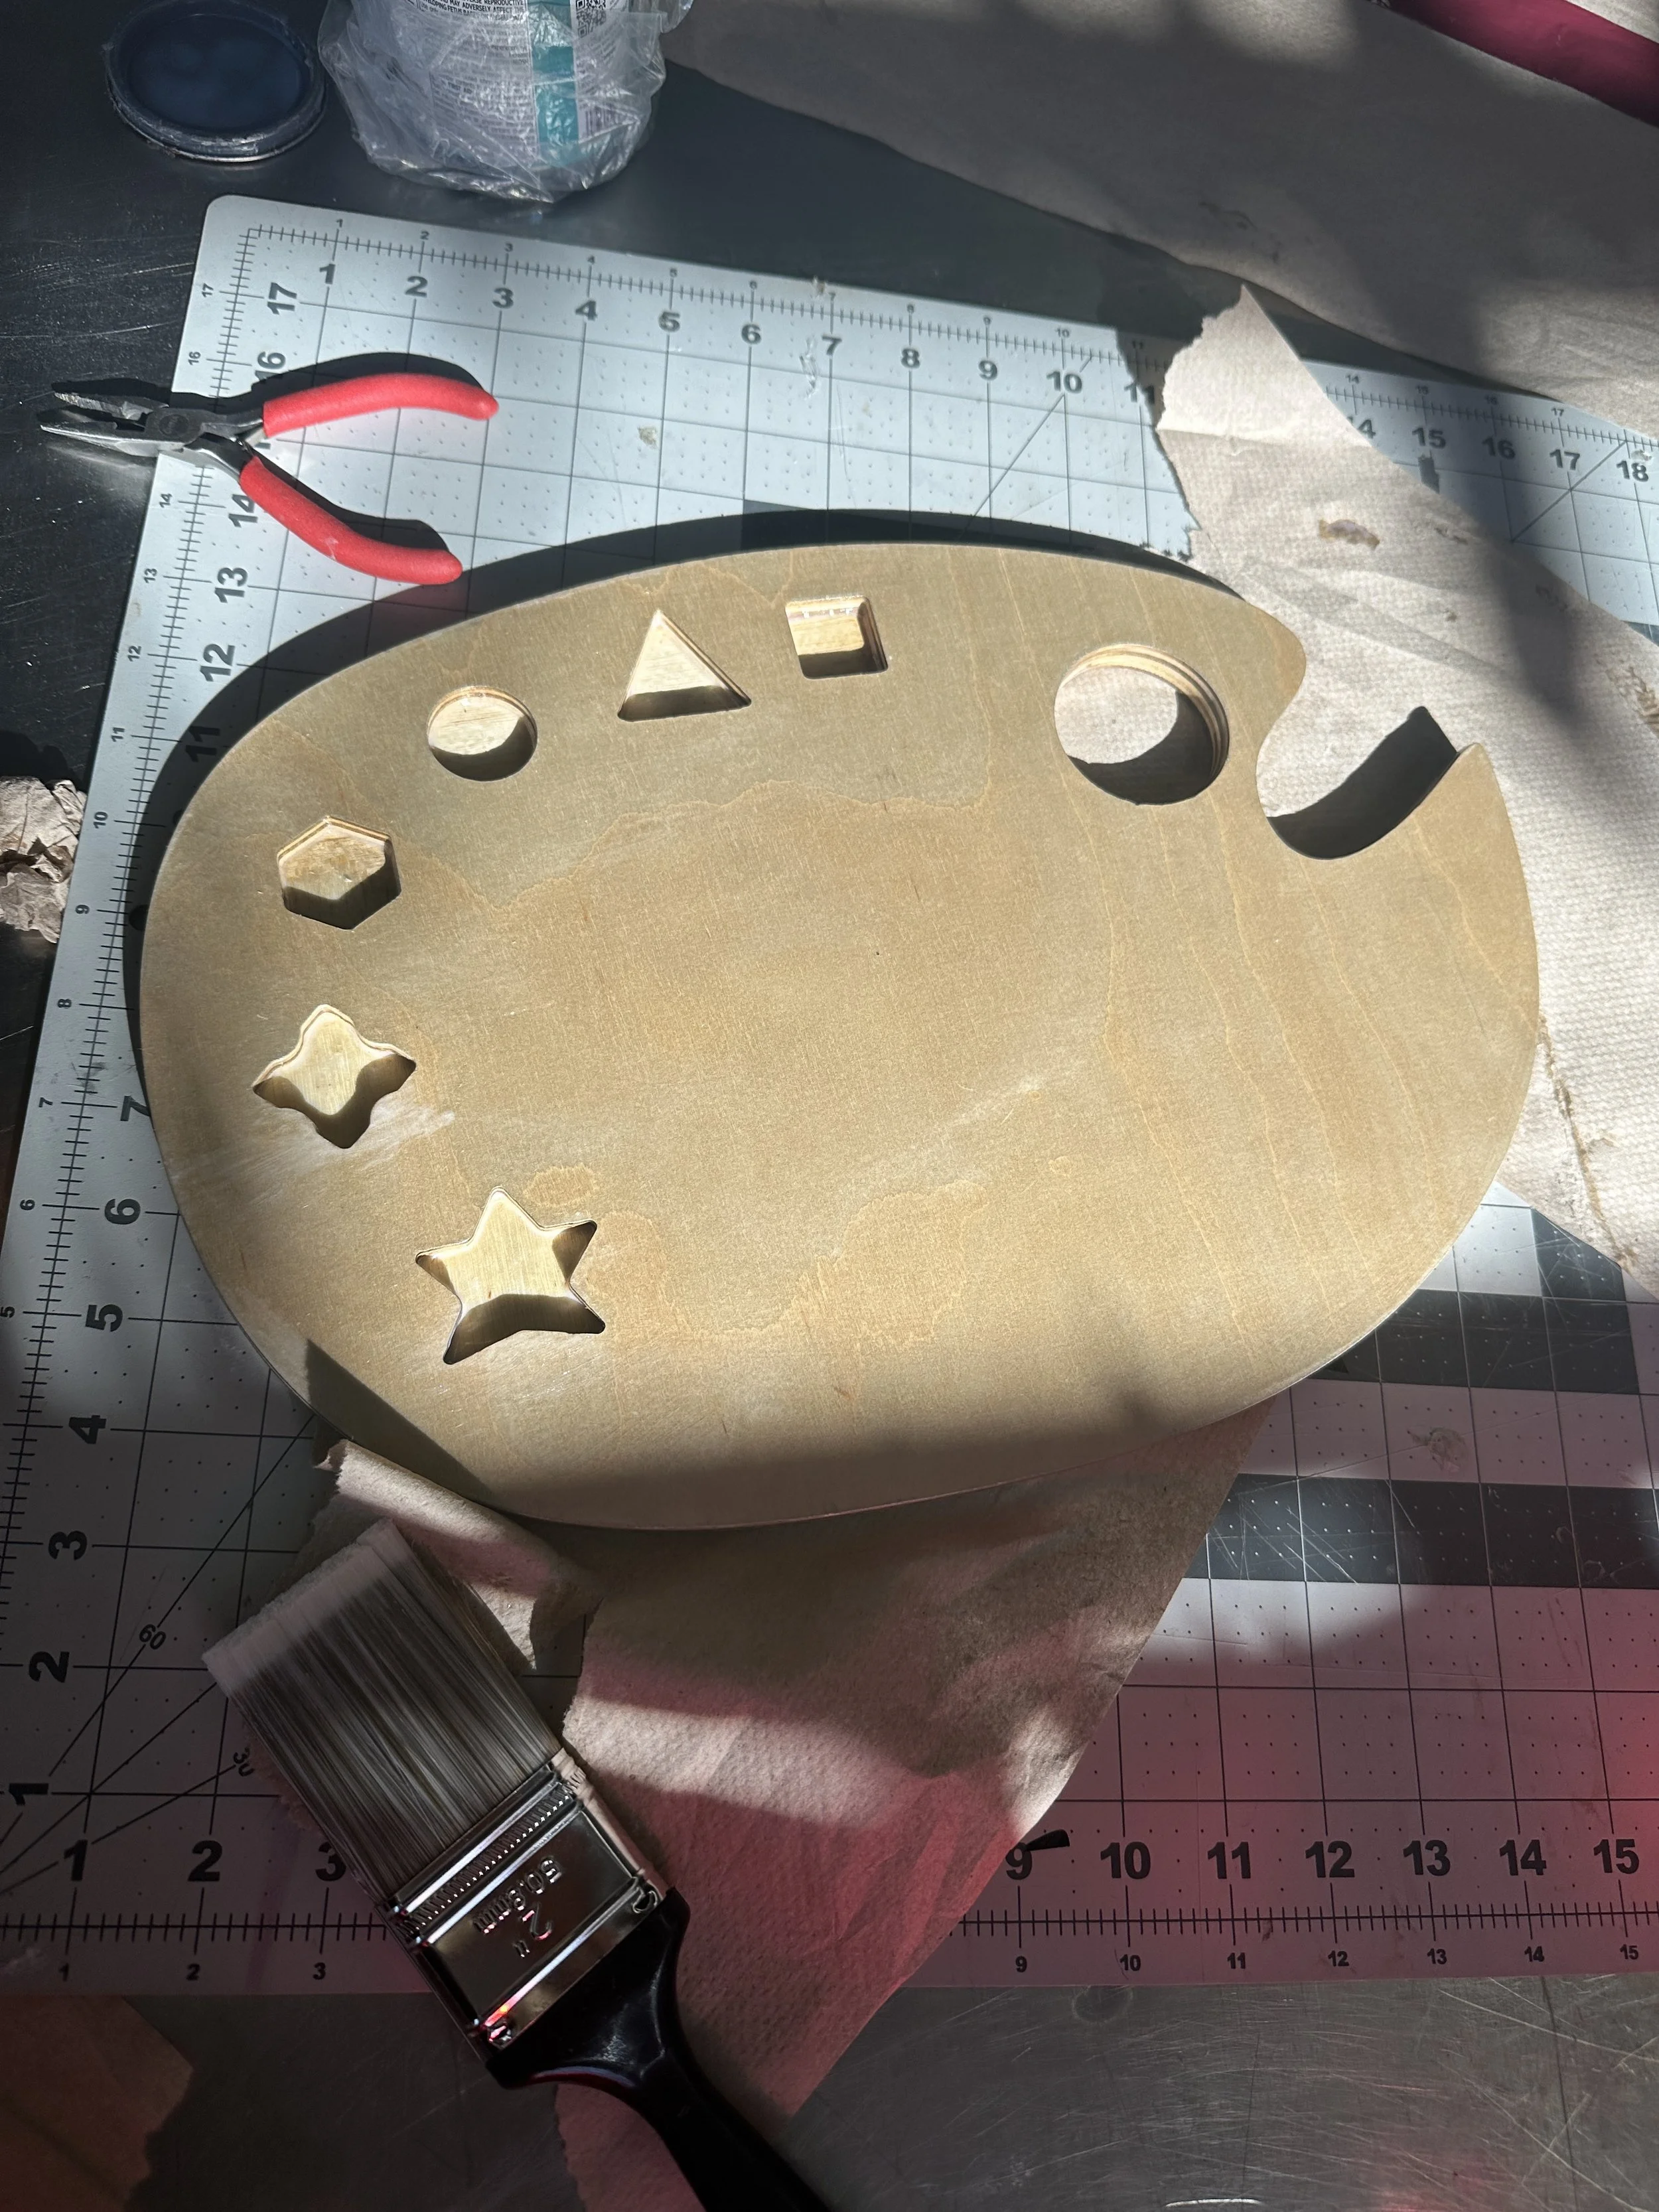
Cleaning Up the Palette
Now that I finally had the perfect cutout, it was time to add a wood tarnish to increase the palette's longevity. This would help prevent water from seeping through and give it a nice, clean finish.
Before adding the first layer of tarnish, I sanded down the wood with various grit levels of sandpaper. Over the course of multiple days, I would add a new layer, wait for it to dry, sand down lightly, and then repeat. Overall, I added 5 layers of tarnish, ensuring that this palette could be used for as long as possible.
-
![]()
First coat
-
![]()
Fourth coat
-
![]()
Fifth coat

Finishing touches


This video demonstrates how the magnets interact with each other on the palette. This is meant to help Sierrah place the caps in the right orientation and keep them from falling off as easily.

Applying the gripping tape on the bottom
In the original design, we had attached a mousepad under the palette since it would add light traction, but the result ended up looking messy and unprofessional. After some research, I found a grip tape on Amazon that would not only look nicer and be easier to shape to the palette but would also provide a better grip on whatever surface it was put on. The result was a clean finish that didn't stand out as dramatically as the mouse pad had.

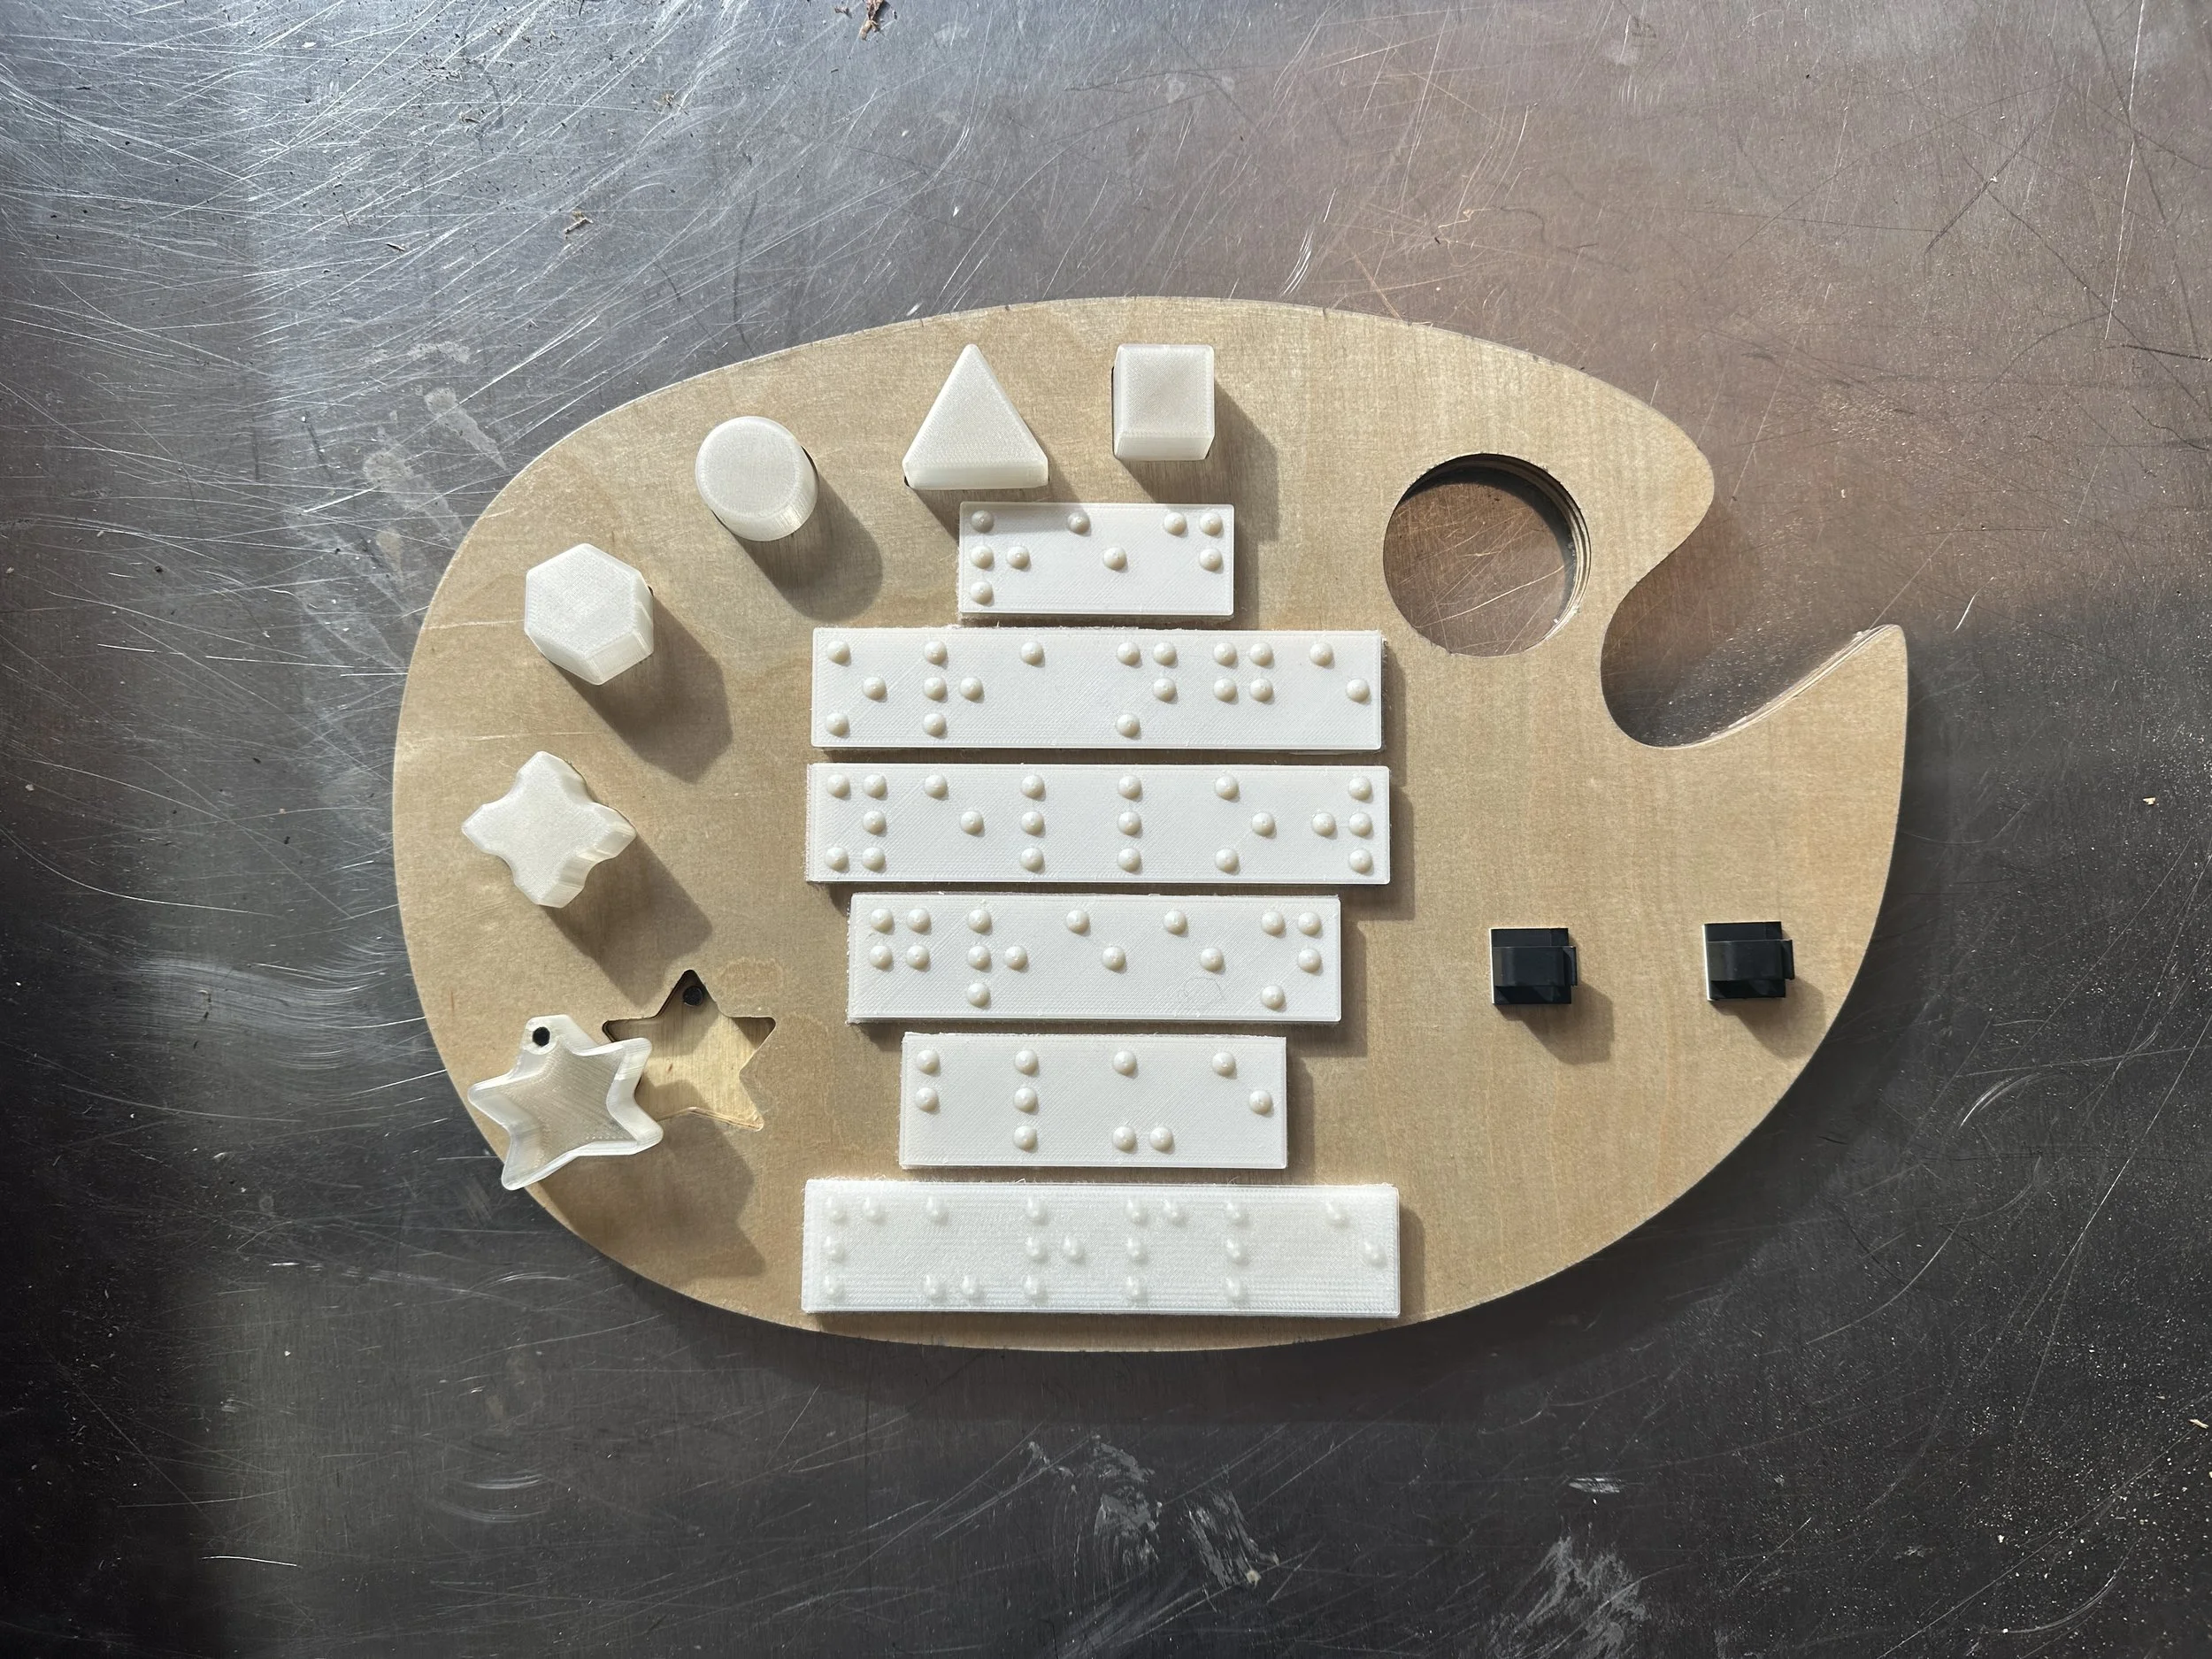
Figuring out the placement of the braille pieces
It was only at this moment that I realized the pieces were bigger than I had hoped, so their layout on the board was different than what I had in mind. This was an error on my part, I tried to accurately space and size the braille bumps, though I didn't scale down the entire piece enough to where it would fit as I had intended. This is the main thing I would change if I were to redo this project.
This is a quick demonstration of the grip of the paintbrush holders. I didn't have a brush with me, so I used a marker as a replacement. The goal was for Sierrah to be able to keep track of her brushes easily while having them in a position that wouldn't affect her painting process.
At last, the finished product!